We are all inventors, each sailing out on a voyage of discovery, guided each by a private chart, of which there is no duplicate. The world is all gates, all opportunities.
Ralph Waldo Emerson

Wednesday, June 30, 2010

(Outdoor) Peaceful Space Transformation


I'm linking this project to
UndertheTableandDreaming


Yay!!


Here's the latest in my efforts to make our home a peaceful, relaxing one.

Frugal outdoor rug tutorial:
-Dollar tree placemats (Bamboo? At Dollar Tree? Awesome!)
-Duct tape
-Scissors

Arrange place mats wrong side up on a flat surface with the edges flush against each other.
The spaces left between the mats in this photo are for your benefit. Aww, aren't you special? ;)
Measure, cut and apply duct tape to fit securely where the edges meet (forgot to take a photo of that step).

Aaahhhh.... cute little outdoor rug.
Seeing it when we open the door makes me smile.

And here's what you see as soon as you walk out the door and stop staring at the pretty new bamboo door mat.
My guests and I have already put this relaxing space to good use. It's so nice having a little area to sit and enjoy the fresh air and my pretty plants.
Baby Boy loves to lay on the rug talking to his toy parrot. Another excuse to be outside :)

A few details....
A lovely little collage of plants brightening up one of the corners.

Another Dollar Tree place mat rug. Love it!

Happy sunshiny home for my new plants!
The little crates were a Dollar Tree find as well.
I'm so happy with how this frugal transformation turned out. I hope to add more things to personalize the space as the days go by. For now, I think this is an adorable start!
I plan to use this as a place to rotate my little plants. Right now there are a few in the apartment that will be placed here to soak up sun for a few days and these will be brought inside for a change.

Do you have a spot you could make a little more relaxing? Treat yourself to some frugal ingenuity and brighten up a space you can really enjoy! It doesn't take much, and the results are definitely worth it.

Enjoying My Wonderful Guests

I've been wonderfully busy with family that have come to visit! I'm having a marvelous time and Baby Boy is eating up the attention, loving every minute of it. So, forgive the lack of posting, but I'm off relaxing in the pool and enjoying lovely foot massages, all very much appreciated after the previous weeks of detail cleaning. The weather here is gorgeous! Tomorrow's Spa Night, so don't forget to take the time to pamper yourself this week. You will be much happier for it! Later then :)

Friday, June 25, 2010

Frugal Bug Repellent

Just adding things to my Household Tips as I remember them.


Frugal Bug Repellent:
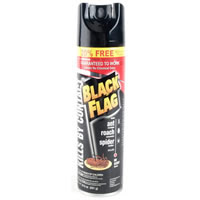
Every Spring, I invest in a can of Black Flag, and a huge bottle of baby powder (regular, not the pure cornstarch one) to discourage the bug invasion that tries to happen once the weather turns warm. I get the Black Flag for ants, roaches and spiders. The baby powder is extra protection against ants. Yup, baby powder.

Bug prevention is a three day process around here:
DAY ONE:
I walk around the outside of the house, scrubbing the window frames, clearing any trash or accumulation of rubbish or vegetation where the house meets the ground. I can usually get half the outside done one day one without collapsing in exhaustion at the end of the day. Dinner, daily chores and a baby also have to get taken care of, you know.

DAY TWO: 
Repeat steps from day one on the rest of the exterior.

DAY THREE: 
Starting at the front of the house and working my way around, I spray Black Flag around door and window frames and all along the bottom of the walls where they meet the ground. If I'm feeling particularly like super wife (and if there's enough Black Flag), I also spray the edges of the driveway. 
Then I sprinkle a thin layer of baby powder all around the house as well, but not flush against the bottom of the wall like I did with the spray. Maybe about 2 - 3 feet from the wall. Just a sprinkle, trying to make it a constant trail without any breaks in it. I don't leave a thick carpet of baby powder and I don't fill in the entire space from the powder line to the wall. That's it! 

I remember reading the baby powder trick (to keep ants away) somewhere after we got married. I scoffed, but hey, it was cheap! So I tried it and what do you know? It works! 

NOTE: I don't constantly replenish these 'bug barriers' every week. I probably should, but I think it then becomes way too expensive. Mostly, I just spot apply when I see a new ant trail on the outside walls. I make sure to reapply the whole shebang after a big rainstorm, though, as the virtual bug fence will have been washed away.

Now, I've tried recipes of dish soap, vinegar and water mixed together as ant spray and many people online have used it successfully, but it didn't work for me. Not as an ant spray anyway. I came up with my own recipe for an awesome cabinet degreaser (originally published in this post) using the same ingredients, though. I'm only in the beginning stages of trying to eliminate chemicals from our home. But for now, Black Flag works for me. 

Thursday, June 24, 2010

Spa Night: Sweet Little Facial

Tonight I was so dead tired, but still needed a little girly time to feel better about the long week. I don't have much on hand, but I came up with a sweet little facial and spent a blissful 20 minutes relaxing.

Here's what I used for my

Sweet Little Facial:
-Honey
-Favorite facial cleanser. I love this homemade castile soap bar, brought home from our South Pacific vacation last Christmas.
-A teaspoon of granulated sugar.

STEP 1: Lather Up! Using warm water to open up pores, lather up face and neck with cleanser.
STEP 2: Exfoliate. Pour sugar into your hand and massage into face, using the suds to distribute it evenly. Apply light, even pressure, working all over around the hairline, eyes, nose and mouth. Don't forget the neck.
STEP 3: Rinse well and pat dry.
STEP 4: Apply honey as a mask all over face and neck, making sure to apply thinly on forehead, so it doesn't drip into your eyes as you let it set. Leave on for 15 minutes. Rinse and pat dry before applying toner and moisturizer.
Enjoy your sweetly polished skin. Mine felt amazingly soft!

I don't know why, but after doing this simple facial, I was so unbelievably relaxed. I think it shows that I definitely needed some down time! Here I am ready to fall asleep, I was so refreshed.


With all that you do for others, don't forget to make time for yourself this week. It will be worth it. Happy pampering, you beautiful people!

Itty Bitty Update

Yes, gross, I know. The oven before.


And after getting blasted with my usual baking soda/vinegar combo (which did not do a thing), and 3 rounds of Easy Off (thanks to my SIL!). Still a few stubborn spots, but exponentially better.


Miscellaneous things had collected on our small front stoop.
A weed eater, weed eater string, antifreeze, brake fluid, oil, oil changing bin, a trash can, Baby Boy's kiddie pool, a plastic bin full of rusted toys, a bag of quickcrete, and a few (heavy!) odds and ends collected from Hubby's construction days.

This is what I encountered while trying to clean it.
Why yes, that is a black widow. Guarding three egg sacs.

One brave brother later, and it's a dead black widow. It made a glorious splatter. The egg sacs just went 'smush'.
I was too creeped out to do any more on the stoop that night, so work stopped for the day.
The next day, I worked on it again and had the pleasure of meeting a tarantula.
It was monstrous! I have never seen a live spider that huge in my entire life. Not the kind of people I'd like to make permanent friends with.
I didn't have time to take a photo of it. Bro was at work, you see, and I was in too much of a hurry to kill it.
He was nice enough (my bro, not the spider) to find a website with a photo of it for me, to be sure I saw what I did. I called it a tarantula because (judging from TV) that's the only arachnid I could compare it to, being so hairy. I was so grossed out to find it was an actual tarantula.
Here's it's twin: *shudder*

Cleared of all spiders.... for now. The grass has been cut since then so it looks a little better than this photo.

I've also found two thriving hornet's nests high above the stoop. So high, I can't get at them. But I've had to kill 4 of the wasps. It seems like every time I come back inside, I find one wasp that has followed me into the house. All I can say is, God bless Black Flag and fly swatters.

Chadwicks Coupon Code $15 off $15 or more

I just ordered these two pieces of gorgeous jewelry for less than $10 shipping combined! They were in the clearance section at Chadwicks and I used a coupon code CHFORYOU15  for $15 off any purchase of $15 or more. It expires at midnight tonight so click on over and check out their sale. You never know what you might stumble across.

I love love love pearls. My favorite are black, peacock green, chocolate and champagne pearls, but sometimes the way white pearls are used in a piece are just perfect.

Here's the first piece. Seed pearl earrings which I snagged for a whopping $1.32

And the second half of my order, a coral and cz ring which cost me a whole $1.66
I love all the semi precious stones: coral, jade, amber, tiger's eye, turquoise, etc. I've only recently begun to hunt for pieces with genuine semi precious stones, but on a tight budget the search (or acquisition) goes slowly. I don't mind, though. Once in a while, these amazing coupon codes are released  for different online stores and then the hunt is on! I don't always find something, but when I do, it gives me amazing satisfaction to know I found something I love for such a great bargain.  The biggest part of this order was shipping. Aaahhhh... I cannot wait to get these in the mail!


Products Ordered:

Description:   Color:  Price Each:Your Price:Shipping Status:
2155-00595-1265
EARRINGSPEARL$7.99$1.32Instock
2155-71608-1265
RINGCORAL CUBI$9.99$1.66Instock


Merchandise Subtotal:$17.98
Promotion Savings:($15.00)
Estimated Shipping:$6.99
Shipping Surcharge:$0.00
Tax:$0.00
Your Subtotal:$9.97
Order Total:                           $9.97

Many many thanks to Heather at My Sweet Savings for another great deal!

Tuesday, June 22, 2010

Cotham's

Our Saturday trek to Cotham's in Scott, AR. This little place has been featured on the Food Network and Travel Channel for it's Hubcap Burger, a ridiculously huge beef burger served with all the fixings.

As Hubby so lovingly commented last night on skype, Baby Boy and I are losing our tans. Can't wait to get back to the swimming pool and be a little lazy after these crazy weeks.

Bro and the infamous Hubcap Burger.
It was smaller than on the TV shows, which was a little of a disappointment for my photo. You can order it with up to 4 patties.

A few details that made up the relaxed, old timey general store ambiance.
Tiny wicker/wire baskets for sweeteners...

Gingham curtains framed with a plastic pine Christmas garland and Christmas lights...

And tons of quaint antique fixtures like this real telephone on the walls....

Overall, a very enjoyable visit :)

I Love My Daddy

Presented this to Hubby on Father's Day and didn't get around to posting it here.

A virtual photo card from Baby Boy to his Dad:


I love my daddy.

I love my daddy because he takes me on new adventures!


Daddy holds my hand when I'm a little afraid....

And to keep me safe when we're out for a walk.

I love my daddy.

I love spending time with my daddy.

Whether it's just to be together......


Or to talk about our day.

Daddy's always ready to spend time hanging out...

Or help me read my special wishes that come in the mail....

And even play the funny face game.

My daddy gives the biggest and warmest hugs!

But mostly, I love my daddy..... because he's Daddy.

And I'm his little boy.
Happy Father's Day, Daddy! Mama and I love and miss you!


Wishing a Happy (belated) Father's Day to all the wonderful daddies out there! Especially the original: Mama's dad and Baby Boy's Papa. Alofa atu....

Tutorial Tuesday: How to Replace a Light Switch Plate

It seems the previous owner used a sprayer to paint all the rooms, including the light switches and outlets. Not a great look. To top it off, it is flat paint so it absorbed every smudge and print left by frequent use.

This was my very first time changing out switch plates, so I figured I'd document it.

STEP 1: Use a box cutter to cut through the paint attaching the plate to the wall. Do not cut into the drywall! Notice the angle of the blade. All that was needed was to separate the plate from the wall.

STEP 2: Using a screwdriver, remove the tiny screws and then lift off the plate.

STEP 3: Install the new plate with new screws, making sure it's straight. 
These took less than 2 minutes each. I can imagine how quickly it would go replacing plates that aren't fused to the wall with paint. 

Repeat on outlet covers.
You can see the switches and actual outlets are still caked with paint, but it looks a whole lot better. I was excited to do this little makeover! During my cleaning, I came across a bunch of these plates Hubby collected while he was working construction. I think it makes a big difference! Not perfect, but much better. Only a few more plates to go before I'm done with this little project.

I found remnants of a pretty (but dated) wallpaper under the kitchen light switch plates. I'm curious now what this place looked like originally.... it has me daydreaming about the people who may have lived here.

Well... back to the grindstone. I get to see my man soon! Yay!!

Start Swagging!

Recommended reading and other products...