We are all inventors, each sailing out on a voyage of discovery, guided each by a private chart, of which there is no duplicate. The world is all gates, all opportunities.
Ralph Waldo Emerson

Showing posts with label beauty. Show all posts

Thursday, March 31, 2011

Spa Night: False Lashes Daydreaming

I LOVE false eyelashes. Or I used to. Now I love the idea of them and daydream about those good old days when I used to wear them. Here's a quick history about me and falsies.

No falsies, Baby Boy was 3 months old.

Me lately looking at my funny boy in the mirror. No falsies. I miss 'em!

The following photos are all of me wearing natural looking false lashes. I worked very hard (trimming, careful application, etc) to make it look inconspicuous and eventually wore them almost every day because with all that practice, it took me no time at all to apply them. I wanted to wear them for Hubby and my anniversary dinner last year and was frustrated to find that I'd lost the knack! Well, after over 2 years of not wearing them, I guess that's normal. My girly heart was sad, though. Anyway, here's a short collection of some falsie pics. And it's no coincidence that they are all pre-baby :)

Wedding day. I was absolutely wearing them that day! Here I have a mix of soft black and brown lashes with a sheer golden shadow on my eyes. I was really happy with how the brown lashes and gold shadow made my baby browns pop. Plus, we had a great photographer who I'm sure helped me along in the editing department *wink*

Married nearly a year. Very subtle top lash falsies in black.

Pregnant with Baby Boy! Black falsies on the outer corners of my top lids.

7 months pregnant with Baby Boy. Black falsies on my lower lids. They don't just belong on the top! I loved changing it up with wearing some only on the bottom lid sometimes.
I'm with my niece Dianna. Isn't she beautiful?

So... all that to say, I know I'm about to have a child in the next 4 weeks and will probably have even less time to get prettified in the mornings, but I want to wear falsies again! I just bought 10 pair on ebay for about 14 cents each. Ooh yeah. Gotta love buying in bulk from across the pond :) Anyway, I figure when I have the time I won't feel guilty about messing them up while I practice.

For tonight's spa night I'm doing a foot soak, repairing one of my finger nails (yes! I broke one already! So soon after my spa visit. grrrr) and dyeing my hair. Oh hush, it's ammonia free dye and temporary, so don't get all worried for Baby Belly. I'm just trying out a slightly lighter shade of brunette.

What will you do to pamper yourself this week? Take the time... you won't regret it and your family will appreciate not dealing with Mama bear all week :) Have a fabulous Spa Night, Beauties!

Thursday, February 3, 2011

Spa Night Beauty Tip: Beautifully Curled Lashes

I am a huge fan of curling lashes before applying mascara. I think it really pulls the eye upward, making you look more awake and definitely shows off your lashes better.

I use a normal lash curler, like the one pictured above. Nothing fancy. You can find it for a couple dollars at WalMart, Target, or Walgreens. Whatever mass merchandise retailer you shop at, really. The problem is, people don't know how to use one to the best effect.

There are several ways to get those va-va-voom lashes. You just have to give 'em a go and figure out which one's right for you.

Method 1: Swipe, Curl, Swipe
- Put a light coat of mascara on.
-Immediately curl your lashes. Don't let the mascara dry. 10 is the golden number for lashes. Hold lashes in curler for 10 seconds before releasing.
-Add last coat(s) of mascara for pretty flirty lashes.

Method 2: Curl and Swipe
-Curl clean lashes. Remember 10 seconds at least!
-Apply your usual coats of mascara for a more subtle, but defined lash line.

Method 3: Heat it Up, Baby! (My all time favorite)
-With your blow dryer on low heat, give your lash curler a 10 second warm up. No more. You don't want to burn your eyes! I still test it with my fingers before applying it to my lashes, just in case.
-Curl lashes with the warm curler for 10 seconds.
-Immediately apply your usual coats of mascara for a very defined and come hither look. No falsies required.

I've used this trick successfully on so many unsuspecting people: girls going to prom, college gals going to a formal event, my sis on her wedding day... Ha! And you know what? It works.
The heating method can make a cheaper mascara go from blah to gorgeous! I use it mostly for date nights but whenever I have some extra time while getting ready and am feeling a little sassy, I heat it on up.

If you try any of these, let me know which worked best for you.
Have a lash luscious Spa Night, Beauties!

Sunday, December 5, 2010

Hope for OCM Ravaged Skin

Just wanted to post a recent photo to let any of you who are dealing with fallout from the Oil Cleansing Method, if you stop now there is hope! Click here to read my post about how bad my skin became after faithfully using OCM in hope of better skin. Warning: The photos are gross and embarrassing, but true. I'd rather post them and save someone else the trouble than care about my being embarrassed.

So here I am now. Yay! I know I look tired. Forget that. Look at my skin.

I am not wearing foundation. My skin is not totally healed, but it's looking much better and I have to say with all my frustrations, there's only one combination that works: Drink lots of water, keep skin clean and pray pray pray! I'm back to using only my herbal soap and water. If I get really oily, I swipe a toner soaked cotton pad over my Tzone. That's it! Hope to be able to wear foundation again soon :)

Tuesday, November 30, 2010

Oil Cleansing Method FINAL REVIEW: Be Warned

Disclaimer: Sorry about the gross photos, but it's my proof. I'm not just being a brat about this, I truly think it ruined my skin. As far as I'm concerned, OCM will no longer be on my beauty regimen.


Early September
Clear skin
Ok, I loved the OCM and raved about it in this post. However, a few weeks after that I started breaking out all over my face. I stuck it out, knowing that most people go through  a purging period before skin stays totally clear and pores are finally shrunk down beautifully. So I waited, faithfully doing OCM every evening, and then the pimples became painful cysts. I finally stopped using it and was so self conscious about my skin. It looked horrible!
Late September
Acne & cysts, Right side

I stopped using OCM. After a ton of research about natural methods and my particular skin type, I have been taking measures to 'fix' this horrible mess.  I now spot apply tea tree oil morning and night and am back to using my all herbal soap to cleanse. The problem is, my pores are clogging up again, but the cysts have shrunk and all but one has disappeared, but thank the Lord it's no longer is painful! I still have pimples scattered about my face and neck, but they are healing and breakouts are happening less and less frequently. I have been applying calming masks and continue to use the rice water toner. All this seems to be helping, but I can't help being frustrated at this method for ruining my skin!

Late September
Acne/cysts, Left side
Before OCM, my skin was clear from using the herbal soap and rice water, but I had read so much about how wonderful OCM was for clearing clogged pores. I thought it was just what I needed. And at first it seemed like a miracle! My skin tone was evening out and pores were getting unclogged and shrinking, but then the terrible breakouts happened. It has been months now and I wish I had never heard of the Oil Cleansing Method. I now have full blown acne and it isn't going away. I'm faithfully using weekly masks and herbal soap and fresh aloe daily but the tiny bumps, scars and pimples do not stop appearing. Thankfully, there are no more painful cysts, but I could do without the acne covering my chin, neck and cheeks.

October. Right side.
October. Left.
I've been reading about others who experienced the same as me and it seems like they all had acne prone skin before. I've never had acne prone skin. So, now I'm about ready to throw in the towel and purchase some commercially made cleansers to see if they'll get rid of the last of it. I've changed my diet and drink water with a splash of apple cider vinegar every day, along with an omega fatty acid supplement and vitamin E (all supposedly miracle workers for the skin) but it hasn't stopped the breakouts. You can see why I'm so frustrated. I haven't taken recent pictures, but it looks a little better (not much) and the bumps are no longer inflamed.


Conclusion:
OCM is not for everybody and if you choose to try it, I would recommend using it maybe once a month to clear pores only where you need it so you don't risk overstimulating your skin and causing nasty breakouts.


Recommendations?
Are you using something, natural or commercial that has worked miracles on your skin? Any suggestions would be welcome!

Saturday, August 7, 2010

REVIEW: Oil Cleansing Method

 I love the Oil Cleansing Method! I think the pictures speak for themselves. Prepared to be frightened. Nah, it's not so bad, but the only way to prove it is to get up close and personal, right?

In all of these photos, I'm wearing my daily makeup which consists of eyeliner, mascara and filled in brows.

BEFORE taken 7/26/2008
When I look at these befores I see 
Uneven skin tone
Dark under eye circles (always had 'em and my biggest beauty problem)
Blemish on the left cheek
Blemishes around hairline
Clogged pores in nose, cheeks and chin
Reddish nostrils from broken capillaries under the skin (always had 'em)


BEFORE
The very first time I used OCM and every time thereafter, I felt whiteheads and blackheads slip out of my pores as I was massaging! I suddenly was aware of what felt like tiny grains of sand under my fingers during the cleansing. Nasty to think about, yes, but awesome as far as results.

The oil and massaging motion gently loosens and removes the hardened gunk in pores to leave skin clear and clean! And because the skin is no longer overproducing oil to compensate for being dried out by commercial cleansers, the pore clogging cycle is stopped and pores can soon shrink back to their natural size. 


AFTER taken 8/07/2010

When I see the afters (or look in the mirror now!) I notice:
More even skin tone all over
Fewer clogged pores in nose, cheeks and chin
Healing blemishes on hairline
No blemish on left cheek!
Lighter under eye circles
Nostril area doesn't seem as red

This one was taken with flash near a window. I was struck with how it looks like I have under eye concealer in this photo, but I wasn't wearing any.


No flash. Same window.


I really love this natural way of taking care of my skin! For me, the results speak for themselves and I will definitely continue with this.

Interested in the Oil Cleansing Method? Read the original post with instructions here. 

Can you tell I've lost a couple of pounds? Woohoo! Because I'm eating more fresh goodies like this:
Mmmmm! Finding out more about natural beauty treatments and seeing how good they are for me really has me interested in taking better care of myself, inside and out. Adding all the fresh produce to my intake of  kefir and kombucha tea is making me feel great! Once detox is over, I should have even more energy. I'm looking forward to it.

Start your journey to naturally clearer, healthier skin! If you try OCM please let me know how it worked for you! Baking soda hair washing review to be posted soon. 

Thursday, August 5, 2010

Spa Night: Rice Water Toner with a Cheapskate Twist! 8/05/2010

I wanted to share this amazingly simple but exponentially brilliant tip sent to me by Barbie @ Adventures of a Wannabe Cheapskate. Remember how much I love Rice Water Toner? You'll also remember how it usually keeps only for a few days so I added tea tree oil to mine, which enabled usage for up to two and a half weeks with no problems. Alright, there's one problem. Tea tree oil is expensive! Well, Barbie came up with a different (and cheaper!) way to make her Rice Water Toner last. In the freezer! No kidding. Awesome, right? Since learning this tip, I am able to save my tea tree oil for other projects and can still enjoy the benefits of rice water! Here it is, in her own words:
I wanted to tell you how much I love the rice water toner.... I tried it, and really like it. I ran out and didn't make any for a while, and I can really tell the difference. I made it a priority recently to make some more. I don't have tea tree oil... When I made it most recently, I poured it into an ice cube tray and froze it. When it was completely frozen, I emptied the tray into a ziploc and stored that in the freezer. I take one ice cube out and put it in a cup in the fridge to melt overnight. I find that the ice cube size is just right for a morning and evening use. So, that's my own cheapskate twist on rice water toner. I love it! And I love that super cold feeling of fresh-from-the-fridge toner. Everybody should keep their toner (no matter what kind they use) in the freezer!

I totally agree, Barbie! I always kept my Healing Toner in the fridge. Even when I used plain witch hazel, it was stored in the fridge for that fresh, cool feeling. I love Barbie's tip because it's so practical, which is what beauty treatments need to be when you're busy enjoying life. So, thanks for the great tip! It has made having my rice water even more frugal and it lasts a whole lot longer.

Using the rice water ice cubes has been a huge time saver for me! I love to swipe the ice cube over my clean skin in the morning for a refreshing wake up call that's good for my skin too. Using it this way in also helps to reduce my morning companion: puffy eyes. I use half of it in the morning and toss the rest of the ice cube into a ziptop snack bag back in the freezer.
In the evening, to finish off my Oil Cleansing Method, I swipe the rest of the ice cube over my face and neck until it's gone. Aaahhh.... very relaxing.


Do you love homemade skincare? If something doesn't work at first, tweak it! You might find a fabulous new way that works for your unique skin situation. Or maybe, like Barbie, you'll find an all around better way of doing things. That's what is so wonderful about making your own products. You can adjust ingredients, preparation, and consistency to suit you. And that, my friend is a beautiful thing!

I'm linking to:
giveaways

Thursday, July 29, 2010

Spa Night: Oil for Facial Cleansing 7/29/2010

WARNING: A few people, including myself had less than stellar results with the Oil Cleansing Method (OCM). Click Here to read my two posts explaining why I eventually gave up OCM.

Using oil instead of soap to cleanse your face? This website is filled with extensive information on this ancient but now almost unheard of method for clear, beautiful skin! I found that reading what people who have actually used it are saying has been helpful too. The idea that something so simple could be so much better than all the technologically advanced cleansers we have now is definitely enough to pique my interest.

Here are some of the questions I initially had and the answers I've found:


How is the cleansing done?
~A quarter sized amount of natural oil is massaged vigorously onto face for at least 5 minutes. This motion loosens the hardened material in enlarged pores and with continued use will remove them completely. 

~Makeup doesn't even need to be removed before doing this, the oil will remove it, even mascara.

~Once the massage is over, gently wipe the oil off with a hot steamy washcloth, rinsing the towel and wiping until all oil is removed. This is important. Remove all of the oil, even if you didn't wear makeup. The oil on your face is now dirty and leaving it on your face might cause more problems.
 That's it. No need to rinse. Toner and a bit of clean oil as moisturizer and you're ready for bed.

~In the morning, use a clean washcloth to gently wash your face with water only. 


How often is this done in order to see results?
~Once a day before bedtime. 


Why oil?
~The whole premise is that commercial facial cleansers strip skin of it's natural oils. In response, skin overcompensates by producing too much oil which clogs and enlarges pores. 

~The oil used is pure and natural and extremely good for skin care. Castor oil, extra virgin olive oil, virgin coconut oil, etc.

~Oil gently cleanses the pores by loosening built up dirt and oil clogging the pores. Removing these blemishes without stripping moisture from the face is key! Facial skin is left invigorated (from the massage) and gently deep cleaned. 


Does it work?
Many people have seen significant improvement in their skin with the Oil Cleansing Method (OCM) including: 
Disappearance of blemishes
Even skin tone
Unbelievably soft skin
Disappearance of blackheads/whiteheads
Reduced dark circles under eyes
Plumper, younger looking skin


What type of skin has it worked for?
Combination skin
Normal skin
Oily skin
Acne prone skin
Diagnosed rosacea
Sufferers of psoriasis


So what are your thoughts? Would you try it? 

Yesterday was my second day on OCM (using virgin coconut oil. Thanks to my awesome Mom!) and I'm excited to already see results. My pores are shrinking and unclogging, the whole kaboodle. I have combination skin. Very oily in the Tzone with very dry patches scattered everywhere else. As my skin is adjusting to not being dried out or overproducing oil, I'm happy to see my Tzone isn't so oily and there are definitely no more scaly dry patches! After two days! So, needless to say, I'm sticking with it and hoping for much better long term results.

UPDATE: Read my review on this amazing cleansing method here!

Thursday, July 22, 2010

Spa Night: Give Up Shampoo?? 7/22/2010

Alright, here's a topic that is potentially cringe worthy but I think is worth a try: Give up shampoo and conditioner in favor of a more frugal hair cleansing regimen.
Could you do it? Could you go without shampoo and conditioner? You know what? I'm up for it.
You can read up on the pros and cons of going without oil stripping commercial shampoo in the same post I stumbled on by Alison @ Wholesome Goodness.

I've already been using my Vinegar Shine Rinse in place of dandruff shampoo and have loved the disappearance of flakes! So, I think this is the next step to healthy hair. Basically, here's what I'll be using:
In place of shampoo- Baking soda and water

In place of conditioner- Apple cider vinegar and water


Here are the basics that have me intrigued:
-Commercial shampoos are too harsh and strip the hair of natural oils.
-After a (very) greasy transition period that could last 2 weeks to 2 months, your hair will find it's natural balance and look it's best.
-Baking soda is a gentle cleanser that's good for the earth, your hair and your wallet!
-Vinegar will restore the PH balance in your hair, stimulate the smaller capillaries in the scalp and lock in shine.

Here's marking day 1! No shampoo or conditioner starting today. I hope I can stand it long enough to get through the greasy adjustment period.

Here's how my hair looks today after using baking soda and vinegar for the first time yesterday:


So far, no signs of overt greasiness. I can't believe the shine! It doesn't even shine like that after a homemade Hot Oil Treatment!

 Looking forward to seeing how this all works out. I"m excited that this frugal solution might actually be better for my hair. So, would you try it?

Thursday, June 24, 2010

Spa Night: Sweet Little Facial

Tonight I was so dead tired, but still needed a little girly time to feel better about the long week. I don't have much on hand, but I came up with a sweet little facial and spent a blissful 20 minutes relaxing.

Here's what I used for my

Sweet Little Facial:
-Honey
-Favorite facial cleanser. I love this homemade castile soap bar, brought home from our South Pacific vacation last Christmas.
-A teaspoon of granulated sugar.

STEP 1: Lather Up! Using warm water to open up pores, lather up face and neck with cleanser.
STEP 2: Exfoliate. Pour sugar into your hand and massage into face, using the suds to distribute it evenly. Apply light, even pressure, working all over around the hairline, eyes, nose and mouth. Don't forget the neck.
STEP 3: Rinse well and pat dry.
STEP 4: Apply honey as a mask all over face and neck, making sure to apply thinly on forehead, so it doesn't drip into your eyes as you let it set. Leave on for 15 minutes. Rinse and pat dry before applying toner and moisturizer.
Enjoy your sweetly polished skin. Mine felt amazingly soft!

I don't know why, but after doing this simple facial, I was so unbelievably relaxed. I think it shows that I definitely needed some down time! Here I am ready to fall asleep, I was so refreshed.


With all that you do for others, don't forget to make time for yourself this week. It will be worth it. Happy pampering, you beautiful people!

Thursday, May 20, 2010

Spa Night: Acne Spot Treatment 5/20/2010

I'm so ready for spa night! Hubby and I worked so hard on Tuesday, cleaning our apartment from top to bottom and doing the huge pile of laundry. It was a long day, but so worth it because our new home is finally organized! Yesterday, I only had to do every day cleaning to maintain the place the way I like it. I had so much free time it was ridiculous. All the extra time got me thinking about tonight's spa treatment as well as starting on designing a more peaceful space in which to do spa treatments. But more on that later.

I am in need of a homemade spa treatment because I am breaking out like crazy. Tea tree oil applied with a qtip has been great for me, but I want to learn to make use of different ingredients I always have in the kitchen. I'm really interested in finding a leave on night treatment. A quick search brought up a popular homemade acne spot treatment that I had never heard about: Cinnamon, nutmeg and honey. This is such great news to me because it makes use of ingredients I almost always have in my cabinets.
I'm naming my version:

 Holiday Spice Acne Spot Treatment


1/2 tsp ground cinnamon
1/2 tsp ground nutmeg
Honey


-In a small container, mix well cinnamon and nutmeg
-Add and mix honey drop by drop, until a very thick paste is formed.
-Spot apply onto blemishes after cleansing and patting dry.
-Leave overnight and rinse off in the morning.


Here's a bonus recipe for you as well, which is rumored to heal blemishes quickly, leaving smooth skin with no scarring! We'll see if it works :)

Miracle Acne Spot Treatment


1/2 tsp ground nutmeg
Milk

-In a small container, add milk drop by drop to nutmeg, mixing to form a thick paste.
-Spot apply onto blemishes after cleansing and patting dry.
-Leave overnight and rinse off in the morning.

Neither of these treatments had specified measurements, but recommended only making enough for one or two uses. That way you would be sure to use fresh treatments to ensure great results. I've used honey in many homemade spa recipes, but after researching the benefits of the new ingredients, I've estimated the amounts needed.

Stay tuned for my Peaceful Space Design Inspiration post. Happy Pampering!

Thursday, May 6, 2010

Spa Night: For Raznoggle 5/06/2010

This post is especially for a fellow blogger at Raznoggle.com, a dear friend of mine who is dealing with some skin changes in her pregnancy. I promised I'd recommend some homemade spa products for her skin type and here they are! Everything here is for dry, sensitive skin with a focus on smoothing, healing and hydrating.

Three steps to happy skin:

Step 1: Remove dead cells and make room for new growth 

Unveil your sweet new skin: If you don't want to make a huge batch of sugar scrub, you can still get the benefits of using this natural exfoliator in your daily skin cleansing and save the majority of kitchen sugar for your coffee!

Lather up your face with your favorite cleanser, then take a small handful of granulated sugar (just a few tablespoons will do) and massage the granules all over your skin for about 30 seconds. Be extra gentle around the sensitive nose and eye area. Rinse off the soap and sugar to reveal smoother, baby soft skin. I use this every day and love it as an alternative to buying expensive scrubs.

Step 2: Nourish your skin with a moisturizing mask. Now that the older dull skin has been sloughed off, let's pamper the new cells and set them up to be moisturized and glowing! I've got three of my favorite masks for you to choose from.

Quenching Mask for smooth, moisturized skin
1/2 small avocado
1/4 cup Honey

-Peel and mash avocado and add honey until you have a thick paste.
-Apply to clean skin and leave on for 15 minutes
-Rinse with cool water.
Skin should feel beautifully soft and quenched!
*This is the mask I"ll be doing tonight. Yay!


Soothing Moisture Mask to heal, soothe and hydrate
 
1 Tbs plain yogurt (w/ live enzymes is best. Hey! a reason to make Crockpot Yogurt! Haha)
Honey
1 Tbs oatmeal

The finer you can get the oatmeal the better. I've used a blender before to blend half a cup of oatmeal almost to a powder, then set aside the remainder in a zip top bag for future spa treatments.

-Warm a spoon by placing in a mug of hot water for 2 minutes.
-Add 4 to 5 drops of honey to the spoon, so honey will be well warmed. 
-In a small bowl, mix yogurt and oatmeal with your honeyed spoon until all ingredients are well blended.
-Apply to clean face and neck, massaging with fingertips to stimulate circulation.
-Relax for 15 minutes as your mask sets. Rinse with warm water and apply moisturizer.
Enjoy your silky smooth, freshly nourished skin!
*This yogurt honey mask is a favorite of mine. My skin feels so silky afterward!*


Deep Conditioning Mask for skin that needs moisture - quick!

1/2 Avocado.
Extra Virgin Olive Oil

-Peel and mash avocado.
-In small bowl, mix in olive oil 1 Tbs at a time until you have a smooth, spreadable paste.
-Apply to clean face and neck. Let it soak into thirsty skin for 10-15 minutes.
-Remove with warm water and revel in your kissably soft, newly conditioned skin :)
*I've used this in the winter for quick hydration. It works wonders!

Step 3: Apply toner and/or moisturizer and enjoy. You're done! It will be hard not to keep touching your baby soft skin :)

Soothing Toner

 The best toner for dry or sensitive skin is the simplest. Green tea! Brew a cup and keep it in the fridge. Apply onto freshly cleansed skin before you moisturize. Replace every 3 to 4 days with a fresh batch.
Witch hazel is also a great gentle toner, but is a little more drying than green tea.

FUN FACTS:
Honey is a naturally gentle cleanser that will aid in healing and leave your skin soft and smooth.
Yogurt, another natural antibacterial, soothes and softens, locking in moisture.
Oatmeal will soothe irritated or dry skin that is developing sensitivity.
Avocado and Extra Virgin Olive Oil are amazing deep conditioners. Use on hair and skin for great results!
Green tea is a wonderful antioxidant that can also soothe dry skin. It's rumored to have anti-aging qualities as well.

SWEET TIP: If dry skin is extremely sensitive and becomes irritated when wearing homemade masks, apply a thin layer of warm honey to skin and then apply the mask on top of that. The honey will act as a breathable filter for your skin, softening and cleansing while allowing the mask ingredients to seep through and work through the protection of the honey 'shield'.

Hope these options help your skin feel fabulous, Raznoggle darling. Who knows? One of these might be your new favorite spa treatment :) Happy pampering!

Sunday, May 2, 2010

REVIEW: Rice Water Toner

I'm loving this new toner! The rice water is amazing! I like it so much better than the Healing Toner I've used forever and that's saying a whole lot because the Healing Toner has been a longtime favorite of mine. Using the Rice Water Toner every morning and evening, so far I've noticed brighter, younger looking skin, less oilyness throughout the day and a more even skin tone.

Also, my hunch about the tea tree oil was right! I'm pretty excited about that. The toner stayed fresh in the fridge for 4 days. I'm pretty sure it would've been good for 5 or 6, but I replaced my stash with fresh rice water on day 4 when I made a pot of rice. Just to be safe. And also to leave me with good toner in case the first bottle went bad before I needed to make more rice.

Not only is the rice water cheaper than my previous homemade toner (since it's from water I would usually throw away), it smells much nicer. No lingering vinegar scent, which is a bonus. I still think my first toner is great! I just have a new favorite.

Bottom line: Rice Water Toner gets an A+

Thursday, April 29, 2010

Spa Night: Rice Water Toner 4/29/10

Can you believe that I might have had one of the oldest beauty secrets in my kitchen all my life and never knew it? I've been researching ancient beauty techniques and what people in different cultures use from their kitchens for skin care and wow, how have I never heard of a Rice Water Toner? It is so easy to make, too! And apparently has a world of benefits. So, to this day, in many Asian households, when the daily pot of rice is made, a cup or two of the rice water is set aside for the mother or daughter's nightly face washing. Interesting! I think it's pretty awesome. I've read that with long time use it can brighten skin, even out skin tone and tame oily patches. That's great news for my uneven, oily skin! It also has a reputation for lightening freckles, but I think that may be a myth. Would be nice, though, if it could remove freckles. I have lots of those! The best versions use organic rice, but um, yeah, that's a little too pricey for me. I still wanted to try it, just with regular rice. Here's what I used:

Rice Water Toner
White rice
Rice pot
Warm water
Ladle
Container with lid

Directions
-Add rice to rice pot.
-Cover with about 1 inch water.
-Swirl rice around until the water gets cloudy
-Let sit 5 minutes.
-Ladle rice water into container.
-Keep covered in fridge for 1-2 days.
-SHAKE WELL before each use. -Apply to clean face and neck and let dry. May be used before makeup application and after makeup removal.

Optional: I added 2 drops of tea tree oil before placing in the fridge. Tea tree oil is a natural antibacterial so I'm hoping it will fight the bacteria and make the toner last longer than 24 hours.  At least until I make another pot of rice! I'll let you know if it works :)

Look how much rice water could be collected from rinsing one pot of rice! Wow. If it could last longer, this would be the cheapest kitchen beauty treatment ever!

There are so many more sophisticated Asian beauty products that can be purchased that offer beautiful results. But rice water caught my interest because the cost is so reasonable (we always have rice!) and it's still being used by people today.
Oh yeah, after squirreling away the water, don't forget to add more and cook the rice!

Thursday, April 15, 2010

Crafty Day & Spa Night

Unpacked a box yesterday and found a postcard I received 3 years ago from my sisters. I loved it so much that I saved it, propped up on my dresser. I decided to give it a new life in a mini shadow box.

To the left is a frame whose glass broke during packing. I was sad, but I knew I could use it for something else. And there's the beautiful mosaic postcard my sisters made for me. The turtle is made of different pieces of colored paper covered with glitter. I love the colors and I LOVE turtles, so I just had to make sure I could enjoy it longer.


I placed the frame on the card and cut so the turtle would be off kilter. Don't know why. I just liked it. I also love the bubbles near the turtle's head so I adjusted it so a few could be seen in the frame.

After spraying both the frame and newly pared down card with an acrylic sealer and letting them dry, I secured the turtle in the frame. For the last step, I cut a piece of blue foam sheet to fit the frame and glued it to the back.

It's up on the wall now. My beautifully personal shadowbox :) I couldn't get the photo to show just how vibrant and gorgeous the turtle's colors are. Trust me, it looks amazing. Hubby saw it when he came home last night and asked, "Where'd we get that picture?". Ah. Success!

Now for the spa part. I just whipped up a face mask and after rinsing, my skin feels baby soft, so I thought I'd share the easy recipe:

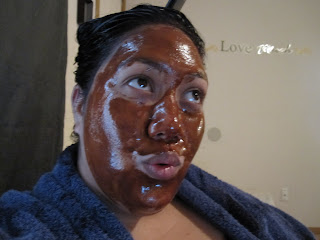
Chocolate Honey Mask
3 Tbs honey
1 Tbs unsweetened cocoa powder

In a small bowl, mix ingredients until consistency is smooth. There will be air bubbles.


Apply to face, massaging into skin. Leave on for 20 minutes. If you get bored because you also happen to be waiting on the dishwasher to get done while dyeing your hair, you could always whistle. Ha!


Remove with warm water. Seal your pores with a final rinse of cold water.
Apply toner and moisturizer and you're done! Enjoy your unbelievably soft skin.

I used a homemade sugar scrub before using this mask, but if you're short on time and want to eliminate the extra time spent on the scrub but still get the benefits of a good scrub (like removing dead skin cells), just adding one more ingredient to the Chocolate Honey Mask can help.

1 Tbs dry oatmeal. That's it! Oatmeal.


When you massage the mask into your skin, the oatmeal will act as a natural exfoliant and soothe your skin too! Honey is a natural antibacterial, helping any open blemishes to heal and unclogging pores. The chocolate powder contains natural antioxidants and supposedly protects your skin from damaging free radicals.

Spa Night in general helps me unwind and destress. Do you need a little relaxation in your day? Try this simple mask and leave the stress behind for a few minutes. If nothing else, you'll feel pampered and you'll see the improvement in your skin. Plus, this mask smells divine!

Tuesday, April 13, 2010

Tutorial Tuesday: Homemade Facial Toner

I
 like to make my own facial products when I can. Every Thursday, which I have claimed for my personal Spa Night, I use different homemade products depending on what I want to do that particular evening. Some Thursdays, I sprinkle homemade moisturizing bath salts into my foot soak, followed by a homemade foot scrub before I treat myself to a pedicure. I almost always do a homemade face scrub and mask on Thursdays, and like to do a deep conditioning oil treatment on my hair twice a month, but I'll save those recipes for a later post. Since the move, I haven't really made the time for my Spa Night and I can see the negative effects in my skin and hair. Today, I wanted to post one of my favorite homemade toner recipes. There are a lot of recipes out there but I like to use a tried and true mixture that works amazingly well for my crazy combination skin.

This is a recipe for a liquid toner that is meant for daily use. I just made a batch (my first in a long time) and it feels amazing on my stressed, broken out skin. Once my skin clears, I know this toner will help to keep it that way.

DAILY HEALING TONER

Ingredients:
3/4 cup Witch Hazel (available in the pharmacy section at WalMart near the rubbing alcohol). Witch Hazel will eventually help to tighten and reduce the appearance of pores so there will be less chance of clogs and damage to your pores.

2 drops of Tea Tree oil. Effectively treats and promotes healing in infections (pimples, blemishes). I got mine at Hobby Lobby for $6.

Water

1/4 cup Green Tea. It has healing, and supposedly anti-aging properties and soothes my irritated skin.

2 Tablespoons Apple Cider Vinegar or White Vinegar. A natural astringent for cleansing gunk from your pores, but gentler than the chemical kind.

Favorite moisturizer

Directions:
-Boil water and steep 1/4 cup of green tea. Set aside to cool.

-In a bottle of your choice, add cooled green tea to witch hazel.

-Add tea tree oil and vinegar. Shake well.

-Apply to freshly cleansed face and neck with a cotton pad or clean washcloth. Let dry and apply moisturizer.

-Store in refrigerator. Shake well before each use. Great to remove excess oil throughout the day, after exercise, etc. Normal use would be once or twice a day, but especially at night after cleansing.

My toner made with this recipe. Fresh out of the fridge, shaken up and ready to apply.

I'll be sharing more of my homemade spa recipes in the future. Hope you get to try this! It's economical, all natural and doesn't have any harsh chemicals in it. I'm not an expert, but I have been using my own products for a long time and have loved the results. If you have any questions for recipes for different types of skin or a particular beauty problem, ask me and I'll do my best to find the right combination of ingredients for you. Happy Tuesday, people!

Saturday, April 10, 2010

The Price of Beauty

I saw a commercial for Jessica Simpson's reality show The Price of Beauty and the idea intrigued me so much that I have just watched the first two episodes online. Having grown up in a South Pacific culture but now living in the US, being constantly bombarded by images of how people in mainstream fashion believe I should look is deeply unsettling. I've never had 100% positive self esteem, but the messages being machine gunned down my throat on billboards, TV and even radio are sometimes overwhelming and have me questioning what I believe beauty to be. Do I believe something is beautiful because that is what I think, or because that is what has been dictated to me as beauty? I don't quite know the answer to that question, but I'm slowly sifting through the rubble in my mind to find what I truly think about beauty and about what I believe is beautiful about myself. Now, in the past, I've been frustrated with Jessica Simpson and her tendency to appear airheaded at times. There were a few moments in the first episode where I thought she was being disrespectful, but she admitted she was wrong (which doesn't change what happened, but oh well) but the idea behind the show has some merit. At least, I believe it does. Instead of the all around exploitation of other reality shows, this show is trying to teach something. It really makes me stop and think about the preconceived notion of beauty. All around the world there are different standards of beauty. Most cultures see another culture's beauty standards as bizarre, but is peer pressure at fault in all these instances? Did someone somewhere decide something was beautiful and everyone else just jump on the bandwagon without asking why? I don't know. But it makes me reconsider my perception of beauty and strengthens my resolve to find inner beauty and not put so much stock on outer beauty. I still like my makeup and girly clothes; I just want to remember that I'm me with the same intellect and talent and compassion whether I'm all gussied up or not.

Start Swagging!

Recommended reading and other products...