Feel free to browse, use and share my collection of homemade spa recipes below. Don't forget to link back to my blog. I share a new Spa Night post every Thursday and will be adding each recipe to this page for easy access. Make time to pamper yourself this week! You won't regret it. Happy Pampering!
- Driftwood Girl
Disclaimer: All homemade beauty products and results are based on my own use and experience. The facts included about these cupboard products are only a few benefits/risks. Use responsibly. I cannot be held liable for any allergic or adverse reactions experienced while using recommended ingredients. No skin treatment presented on this website is intended to be used in place of a doctor or dermatologist's advice. For personal use or gifts only, not intended for sale.
------------------------------------------------------------------------------------------------
Spa Night: Homemade Conditioner for Hair Growth

My wonderful friend and sis Rachel @ Raznoggle.com sent me the link for thishomemade hair conditioner. I don't have all the ingredients, but will definitely be trying this when I do. Check your cabinets! You might be able to do this for your spa night, and if you do, please let me know how you liked it.
Homemade Conditioner - For hair growth
Things You'll Need:
1/4 cup of plain natural yogurt
1 egg yolk
1 tsp. fresh lemon juice
8 to 10 drops of eucalyptus oil
Directions:
Place the natural yogurt in a small bowl. Yogurt is not only the creamy base of your natural conditioner, but it is also a gentle cleansing agent that will help to clear pores. Yogurt has natural anti-fungal and anti-bacterial properties that will gently wash away the dirt and grime that inhibits hair growth.
Separate the egg white from the yolk and add the yolk to the yogurt. Egg yolk is a natural and deep-penetrating moisturizer that will not only make your hair silky smooth, but also help add elasticity and strength, so that as your hair grows it will break less.
Add 1 tsp. of fresh lemon juice to the mixture. Lemon is a natural astringent that will help to remove shampoo and product build-up. Lemon, the same pH as your hair's natural oil, can help protect and seal the hair's cuticle, preventing split ends.
Mix in 8 to 10 drops of eucalyptus oil and stir until creamy. Eucalyptus oil has a cool, refreshing effect on the skin and will help to stimulate blood circulation on the scalp, encouraging hair growth.
Wet your hair thoroughly and apply the conditioner. Massage the conditioner into your scalp gently for at least five minutes. For deep penetrating conditioning, you can wrap your head in a towel and allow the treatment to set for 20 to 30 minutes. When ready, rinse your hair and towel dry.
Click here to be taken to the original eHow article.
Have you taken some time to relax this week? I admit I really need to get my spa night in, it's been a long week!
Psst... thanks, Rachel for the recipe! I can't wait to try it.
Happy pampering!---------------------------------
Spa Night: Easy Homemade Sugar Scrub
My easy recipe for a sugar scrub.
1 cup salt or 1 cup granulated sugar
2 Tbs olive oil or liquid coconut oil
2 tsp honey
3-5 drops of essential oil of your choice (optional for added benefit)
-Mix all ingredients well to evenly distribute the honey and oil.

Think of the lucky dates he will wow with his fabulous spa gifts ;)

Aahhhh.... I love the smell of brown sugar.
-Transfer to tightly lidded container of your choice.
That's it! Look at you, you fabulous homemade beauty! Can you believe you used to pay for this??

Hey, with a name like Smucker's it has to be good, right?
Come back tomorrow for a post on how to get those annoying labels off your recycled jam jar. The easy way!
-For a thinner scrub, add more liquid ingredients a bit at a time until it reaches the desired consistency.
Great on rough spots (knees, elbows and feet) and safe for facial exfoliation too!
NOTE: As with any scrub, be very gentle on sensitive areas around the eyes and nose.
FUN FACTS:
-I added the honey to work as a natural preservative and skin softener and it works amazingly well. This scrub will keep for months and travels well if you want to ship a batch as a gift.
-Salt is great as a scrub, but I prefer sugar because it's not as drying to my skin.
-Olive and coconut oils have been used for centuries as a natural conditioner for both skin and hair. Knowing how to use oils in your beauty treatments can give you a beautiful healthy glow! Click here to read about a way to use these oils instead of chemical laden face washes. That's right, oil to cleanse your face!
This is a basic scrub and you can build on it any way you wish.
As you get more comfortable making it, you can add food coloring to a scrub made with white sugar for a fun presentation. For a little more luxury, add dried herbs and a drop or two of fragrance and essential oils.
Be careful with fragrance and essential oils in a face scrub. A tiny bit is enough! Too much can cause break outs. Fragrance oils are delicious in body scrubs, though and the right scent can enhance the spa experience.
Who says you have to pay a lot for that luxurious body scrub at the store? Make your own for pennies and enjoy creating your very own homemade spa! Hey, you don't even have to drive there!
Have you taken time out for yourself this week? I guarantee, you won't regret it.
Happy pampering, Beauties!
PS
Many of you amazing people already know how to make sugar scrub. What are your favorite ingredients?
----------------------------------------
Spa Night: Rice Water Toner with a Cheapskate Twist! 8/05/2010
I wanted to share this amazingly simple but exponentially brilliant tip sent to me by Barbie @ Adventures of a Wannabe Cheapskate. Remember how much I love Rice Water Toner? You'll also remember how it usually keeps only for a few days so I added tea tree oil to mine, which enabled usage for up to two and a half weeks with no problems. Alright, there's one problem. Tea tree oil is expensive! Well, Barbie came up with a different (and cheaper!) way to make her Rice Water Toner last. In the freezer! No kidding. Awesome, right? Since learning this tip, I am able to save my tea tree oil for other projects and can still enjoy the benefits of rice water! Here it is, in her own words:
I wanted to tell you how much I love the rice water toner.... I tried it, and really like it. I ran out and didn't make any for a while, and I can really tell the difference. I made it a priority recently to make some more. I don't have tea tree oil... When I made it most recently, I poured it into an ice cube tray and froze it. When it was completely frozen, I emptied the tray into a ziploc and stored that in the freezer. I take one ice cube out and put it in a cup in the fridge to melt overnight. I find that the ice cube size is just right for a morning and evening use. So, that's my own cheapskate twist on rice water toner. I love it! And I love that super cold feeling of fresh-from-the-fridge toner. Everybody should keep their toner (no matter what kind they use) in the freezer!
I totally agree, Barbie! I always kept my Healing Toner in the fridge. Even when I used plain witch hazel, it was stored in the fridge for that fresh, cool feeling. I love Barbie's tip because it's so practical, which is what beauty treatments need to be when you're busy enjoying life. So, thanks for the great tip! It has made having my rice water even more frugal and it lasts a whole lot longer.

Using the rice water ice cubes has been a huge time saver for me! I love to swipe the ice cube over my clean skin in the morning for a refreshing wake up call that's good for my skin too. Using it this way in also helps to reduce my morning companion: puffy eyes. I use half of it in the morning and toss the rest of the ice cube into a ziptop snack bag back in the freezer.
 In the evening, to finish off my Oil Cleansing Method, I swipe the rest of the ice cube over my face and neck until it's gone. Aaahhh.... very relaxing.
Do you love homemade skincare? If something doesn't work at first, tweak it! You might find a fabulous new way that works for your unique skin situation. Or maybe, like Barbie, you'll find an all around better way of doing things. That's what is so wonderful about making your own products. You can adjust ingredients, preparation, and consistency to suit you. And that, my friend is a beautiful thing!
----------------------------------------
Spa Night: Oil for Facial Cleansing 7/29/2010

Using oil instead of soap to cleanse your face? This website is filled with extensive information on this ancient but now almost unheard of method for clear, beautiful skin! I found that reading what people who have actually used it are saying has been helpful too. The idea that something so simple could be so much better than all the technologically advanced cleansers we have now is definitely enough to pique my interest.
Here are some of the questions I initially had and the answers I've found:
How is the cleansing done?~A quarter sized amount of natural oil is massaged vigorously onto face for at least 5 minutes. This motion loosens the hardened material in enlarged pores and with continued use will remove them completely.
~Makeup doesn't even need to be removed before doing this, the oil will remove it, even mascara.
~Once the massage is over, gently wipe the oil off with a hot steamy washcloth, rinsing the towel and wiping until all oil is removed. This is important. Remove all of the oil, even if you didn't wear makeup. The oil on your face is now dirty and leaving it on your face might cause more problems. That's it. No need to rinse. Toner and a bit of clean oil as moisturizer and you're ready for bed.
~In the morning, use a clean washcloth to gently wash your face with water only.
How often is this done in order to see results?~Once a day before bedtime.
Why oil?~The whole premise is that commercial facial cleansers strip skin of it's natural oils. In response, skin overcompensates by producing too much oil which clogs and enlarges pores.
~The oil used is pure and natural and extremely good for skin care. Castor oil, extra virgin olive oil, virgin coconut oil, etc.
~Oil gently cleanses the pores by loosening built up dirt and oil clogging the pores. Removing these blemishes without stripping moisture from the face is key! Facial skin is left invigorated (from the massage) and gently deep cleaned.
Does it work?Many people have seen significant improvement in their skin with the Oil Cleansing Method (OCM) including: Disappearance of blemishesEven skin toneUnbelievably soft skinDisappearance of blackheads/whiteheadsReduced dark circles under eyesPlumper, younger looking skin
What type of skin has it worked for?Combination skinNormal skinOily skinAcne prone skinDiagnosed rosaceaSufferers of psoriasis
So what are your thoughts? Would you try it?
Yesterday was my second day on OCM (using virgin coconut oil. Thanks to my awesome Mom!) and I'm excited to already see results. My pores are shrinking and unclogging, the whole kaboodle. I have combination skin. Very oily in the Tzone with very dry patches scattered everywhere else. As my skin is adjusting to not being dried out or overproducing oil, I'm happy to see my Tzone isn't so oily and there are definitely no more scaly dry patches! After two days! So, needless to say, I'm sticking with it and hoping for much better long term results.
-----------------------------------------
Spa Night: Give Up Shampoo?? 7/22/2010
Alright, here's a topic that is potentially cringe worthy but I think is worth a try: Give up shampoo and conditioner in favor of a more frugal hair cleansing regimen.
Could you do it? Could you go without shampoo and conditioner? You know what? I'm up for it.
You can read up on the pros and cons of going without oil stripping commercial shampoo in the same post I stumbled on by Alison @ Wholesome Goodness.
I've already been using my Vinegar Shine Rinse in place of dandruff shampoo and have loved the disappearance of flakes! So, I think this is the next step to healthy hair. Basically, here's what I'll be using:
In place of shampoo- Baking soda and water

In place of conditioner- Apple cider vinegar and water

Here are the basics that have me intrigued:
-Commercial shampoos are too harsh and strip the hair of natural oils.
-After a (very) greasy transition period that could last 2 weeks to 2 months, your hair will find it's natural balance and look it's best.
-Baking soda is a gentle cleanser that's good for the earth, your hair and your wallet!
-Vinegar will restore the PH balance in your hair, stimulate the smaller capillaries in the scalp and lock in shine.
Here's marking day 1! No shampoo or conditioner starting today. I hope I can stand it long enough to get through the greasy adjustment period.
Here's how my hair looks today after using baking soda and vinegar for the first time yesterday:

So far, no signs of overt greasiness. I can't believe the shine! It doesn't even shine like that after a homemade Hot Oil Treatment!
Looking forward to seeing how this all works out. I"m excited that this frugal solution might actually be better for my hair. So, would you try it?
--------------------------------------
Spa Night: Brightening Mask
Here I am with my mom, who was such an amazing good sport during her recent visit. She got a crash course in homemade relaxation! It was tons of fun and we got amazing results. I've used the mask pictured here before, but never posted the recipe, so here it is, a homemade brightening mask.
Brightening Mask
-1/4 cup plain yogurt (ooh, homemade yogurt comes in handy!)
-2 Tbs honey
-1/2 tsp turmeric
-flour
STEP 1: In a small bowl, combine yogurt, honey and turmeric until well combined.
STEP 2: Add a teaspoon of flour at a time, stirring after each, to form a thick spreadable paste. Think facial masks you buy in the store and go for that consistency, like thick mayonnaise.
STEP 3: Apply evenly over freshly washed face, massaging into skin. Let dry for 10-15 minutes as flour tightens the mask.
STEP 4: When dry, remove the mask by scrubbing with a warm, moist washcloth. This is an extra polishing step, removing dead skin cells. Rinse well and apply your favorite toner and a gentle moisturizer.
Enjoy your brightened, smooth as silk skin!
FUN FACTS:-The use of turmeric in facial masks has shown improvement in psoriasis and inflammatory skin conditions, evening out skin tone and promoting healing of open blemishes. Awesome, right? And there are a whole world of amazing things it does for your body when used regularly in cooking.-Honey is one of my favorite at home antibacterials and skin softening agents!-Yogurt is full of healthy bacteria and is another gentle softener.-Use this mask once a week for gradual, brightening results.
Don't forget to take time for yourself this week! Here's hoping you're able to grab a relaxing moment. Happy pampering!
------------------------------------------------------------------------------------------------------------------------
Early Spa Night Post: Healing Liniment Recipe

I played around with the ingredients in the Healing Toner, increasing the measurements to create a healing liniment for my dad.
The liniment worked really well in conjunction with my very first Healing Salve. I'd never made anything like that before and was so excited with how it turned out! Here's a peek at the salve made of:Beeswax, olive oil, vitamin E, tea tree oil, lavender essential oil, calendula and chamomile. Woohoo! Yes, seriously, those are all the ingredients. No chemicals! It was ultra healing and chock full of natural goodness. It smelled lovely, very natural and herbish and worked amazingly well. I love it so much that I'm going to make it regularly to use as diaper rash cream for Baby Boy. Anyway, not to get off topic, but I hope to post a recipe for the salve soon!
Here's the Healing Liniment recipe if anyone wants to give it a try. Enjoy!
Healing Liniment
-Freshly brewed green tea
-Witch hazel
-Tea tree oil
-Water
Just remember, 3-2-1.
In a container of your choice, add 3 parts cooled green tea, 2 parts witch hazel and 1 part water.
Add 1/2 tsp tea tree oil and shake well to combine
Store in an air tight container in the fridge for up to 2 weeks.
Remember to shake well before each use to redistribute the tea tree oil, which will float on top after sitting.
Apply to freshly cleansed skin to heal, cool and soothe sore muscles or open wounds.
Easy, right? Here are some FUN FACTS:Tea tree oil- Natural antibacterial, and a gently powerful healing and cleansing oil.Witch hazel- Successfully used as pain relieving topical treatment for bruises, insect bites, sunburn, minor burns, poison ivy, hemorrhoids, varicose veins, stiff muscles and blemishes. Wow! Don't you just love this stuff? NOTE: Guys, witch hazel is a fantastic natural aftershave. Ladies, on it's own it's an amazing toner you can use before makeup application or after makeup removal.Puffy eyes? Soak cotton pads in witch hazel and rest them on your closed eye lids for 10-15 minutes for a quick refresher.Green tea- Believed to have both healing and anti-aging properties.
Let this serve as an early reminder to make time to relax this week! Happy future pampering!
----------------------------------------------------------------------------------------------
Sweet Little Facial:
-Honey
-Favorite facial cleanser. I love this homemade castile soap bar I brought home from our South Pacific vacation last Christmas.
-A teaspoon of granulated sugar.

STEP 1: Lather Up! Using warm water to open up pores, lather up face and neck with cleanser.
STEP 2: Exfoliate. Pour sugar into your hand and massage into face, using the suds to distribute it evenly. Apply light, even pressure, working all over around the hairline, eyes, nose and mouth. Don't forget the neck.
STEP 3: Rinse well and pat dry.
STEP 4: Apply honey as a mask all over face and neck, making sure to apply thinly on forehead, so it doesn't drip into your eyes as you let it set. Leave on for 15 minutes. Rinse and pat dry before applying toner and moisturizer.
----------------------------------------------------------------------
Cucumber Mask:
Playing around with some new ingredients. I've found the best way to find new original recipes is to mix 'em, slap 'em on, and hope for the best! Here's my twist on an old favorite:
Cucumber Mask:
-1 Tbs kefir
-1 Tbs oatmeal. Get it as close to powder form as possible in a food processor, pestle, or roughly chopped for more exfoliation.
-1 whole cucumber
-2 tablespoons plain yogurt or sour cream
-1 teaspoon honey
Mix together the kefir and oats in a small bowl and set aside.
Peel cucumber and use a blender to liquefy.
Add honey and yogurt. Blend well.
Gently mix in kefir/oats to combine.
Apply to clean face and neck and relax with a book or soothing music for 15-20 minutes.
Rinse and finish up with toner and moisturizer.
-------------------------------------------------------------------------------
Spa Night: Peppermint Foot Scrub & Cucumber Water Review 6/03/2010Tonight's homemade spa recipe is for a Peppermint Foot Scrub! Click here to read some of the great things peppermint oil can do for your health. I love using essential oils and peppermint is one of my favorite in home spa treatments. Personally, peppermint oil has been wonderful applied at the temples and between the eyes to treat a migraine. That and a firm massage to the center of the hairline along the neck can make a migraine manageable. My SIL asked me for a spa treatment recipe and I thought I'd share it here since it's perfectly suited for the sweltering heat. Hobby Lobby carries all sorts of essential oils for about $6 each. Next time you're at the store, pick up the ingredients and enjoy a refreshing foot scrub that feels great on hot summer feet!
This recipe makes enough to fill eight 8 oz jars, so make ahead for yourself to enjoy all summer long, or give them out for a girl's day, hostess gift, or to your guests at your summer barbeque. One of the best things about this scrub is the peppermint oil makes it tingle :) Aaahhhh.....
Peppermint Foot Scrub2 lbs coarse salt (can use sea salt or epsom salts)
32 oz olive oil (or almond oil)
33-40 drops peppermint pure essential oil (depending on how strong you'd like it)
-In a large glass bowl, mix salt and oil
-Add peppermint oil. Mix until well incorporated.
-Transfer to jars with lids
-To be used only as a foot scrub.
-Indulge after a warm foot soak. Scrub, rinse, pat dry.
-Enjoy your fresh smelling, cooled off feet! -For dry skin, apply moisturizer after drying to keep your feet looking great.
Cucumber Water Review
I wrote last Spa Night, how I wanted to try Cucumber Water and when I went to the grocery store this week, I just had to grab a few cucumbers for the recipe. Here's a tutorial in photos and review:
Peel and chop up 1 whole cucumber. I sliced it into pieces that would fit into the jug I was using.
Add cucumber to regular water with lemon juice.I know in home therapy lemon juice in small quantities can be substituted for vinegar, so I didn't pick up lemons because I had vinegar. A few drops of white vinegar went into the mix. You just need the acidity to help the cucumber juice extraction along.
I used peppermint oil instead of fresh mint, mainly because there was none to be found when I went shopping.So, here's where I messed up. I know 2 to 3 drops of peppermint oil in an 8 oz glass of water will settle a gassy/upset stomach. So, I figured 10 drops to 3/4 gallons of water would be fine, right? Wrong!
Let your cucumber water sit covered in the fridge for 24 hours. After that, you can either remove the cucumber pieces or keep them in. I left mine. Serve in tall glasses garnished with a fresh slice of cucumber.
REVIEW: Whoa! Hubby avoids this stuff like poison after his initial taste. And once I tasted it, I understood. 10 drops of peppermint oil was way too much. It was like drinking vapor rub that cleared your sinuses and maybe singed a few taste buds. But, that isn't the recipe's fault. I apparently need to experiment some more to find the right balance. So, I'm still drinking the peppermint water as Hubby calls it, just watered down. A lot. I will put about half an inch of the cucumber water in a glass and fill it the rest of the way with plain water. Then it's drinkable and quite refreshing, but that doesn't stop Hubby from fondly calling me 'Pepomint breath' every time he kisses me. So, I guess, all in all, the recipe went well, and having it so concentrated will make it last a long time :). And hey, pepomint breath is better than halitosis any day.
Don't forget to make time for yourself this week. You'll be able to complete projects or take care of your family with a much happier heart. Happy pampering!-------------------------------------------------------------------------------------------------------------
Spa Night: Cucumber Water 5/27/2010
One of my favorite couponing blogs, Hip2Save, posted ideas for an at home Spa Day! Great minds, y'all. Head on over here to read the complete post and get some delicious sounding recipes to add to your Home Spa experience. I've included the one recipe from Hip2Save that I'm especially dying to try. I just need to pick up some cucumbers the next time I'm at the store. Then hello, relaxation!
Cucumber Water

In order for the cucumber to fully release its juice, you need to prepare it the day before your event.
1 cucumber, sliced and unpeeled + 6-7 cucumber slices for decoration
1 1/2 to 2 liters of water
3 mint sprigs + 2 mint sprigs for decoration
Half a lemon, sliced and unpeeled
Ice cubes
In a pitcher, mix the water, cucumber, 3 mint sprigs and lemon. Let it rest on the fridge for 24 hours. If you prepare the water at the last minute, cut the first cucumber in three or four pieces. Then, squeeze the cucumber pieces to release all the juice. Before serving remove the cucumber slices used to flavor the water. Then stir with a wooden spoon, add some ice cubes, 6 or 7 fresh cucumber slices and the remaining 2 mint sprigs.
If you haven't taken the time to consciously relax this week, what are you waiting for? Your peace of mind will thank you. Happy Pampering!
-------------------------------------------------------------------------------------------------------------
Spa Night: Acne Spot Treatment 5/20/2010
I'm so ready for spa night! Hubby and I worked so hard on Tuesday, cleaning our apartment from top to bottom and doing the huge pile of laundry. It was a long day, but so worth it because our new home is finally organized! Yesterday, I only had to do every day cleaning to maintain the place the way I like it. I had so much free time it was ridiculous. All the extra time got me thinking about tonight's spa treatment as well as starting on designing a more peaceful space in which to do spa treatments. But more on that later.
I am in need of a homemade spa treatment because I am breaking out like crazy. Tea tree oil applied with a qtip has been great for me, but I want to learn to make use of different ingredients I always have in the kitchen. I'm really interested in finding a leave on night treatment. A quick search brought up a popular homemade acne spot treatment that I had never heard about: Cinnamon, nutmeg and honey. This is such great news to me because it makes use of ingredients I almost always have in my cabinets.
I'm naming my version:
Holiday Spice Acne Spot Treatment

1/2 tsp ground cinnamon1/2 tsp ground nutmegHoney
-In a small container, mix well cinnamon and nutmeg
-Add and mix honey drop by drop, until a very thick paste is formed.
-Spot apply onto blemishes after cleansing and patting dry.
-Leave overnight and rinse off in the morning.
Here's a bonus recipe for you as well, which is rumored to heal blemishes quickly, leaving smooth skin with no scarring! We'll see if it works :)
Miracle Acne Spot Treatment

1/2 tsp ground nutmeg
Milk
-In a small container, add milk drop by drop to nutmeg, mixing to form a thick paste.
-Spot apply onto blemishes after cleansing and patting dry.
-Leave overnight and rinse off in the morning.
Neither of these treatments had specified measurements, but recommended only making enough for one or two uses. That way you would be sure to use fresh treatments to ensure great results. I've used honey in many homemade spa recipes, but after researching the benefits of the new ingredients, I've estimated the amounts needed.
-------------------------------------------------------------------------------------------------------------
Spa Night: Chamomile Steam 5/13/2010
Aaahhhh....Thursday. I've missed you so. Right now, while Baby Boy's down for a nap, I've done a Chamomile Steam followed by a Quenching Mask. If you want to try it yourself, just follow these steps to relaxation:
Have the mask you will use following the facial steam ready before hand.
Chamomile Steam:Hot waterChamomile tea bagTea tree oilMedium bowlBath towelSome sort of timer. I just use the one on my microwave or stove.
-Use a headband or tie hair in a pony tail to keep it out of your face.-Boil enough water to fill your bowl.-Place tea bag in the bowl, pour boiled water and let steep 2 minutes.-Add 2 to 3 drops tea tree oil to water. Do not remove tea bag.
-Place bowl on a table at a comfortable height that will allow you to lean over the bowl, using your forearms for support.-Put on some soothing music or (if your little one is sleeping) relish in the beautiful phenomenon of silence.-Set a timer for 10 minutes.-Position your face over the bowl of water and drape the towel over your head to form a mini sauna.-Breathe in the soothing steam and relax as your pores open up.-When timer goes off, apply Quenching Mask to still warm skin for maximum results.-Rinse, tone and moisturize and you're done! Enjoy your deeply conditioned skin.
FUN FACTS:-Steaming opens up pores, leaving them ready to receive all the goodness you want to slather on as beauty treatments. You can steam to maximize the results of a scrub, mask, toner, etc.-Add your favorite essential oil or herbal tea for a pleasant steaming experience. You can use plain water, but it feels so much more luxurious (and relaxing) when you're breathing in a soothing fragrance.-Steaming regularly can loosen dried oils and black heads that clog pores, making your after steaming treatment that much more effective.-DO NOT forget to apply moisturizer after steaming.
I really need to do this because of the lack of moisture in the air. This island girl needs humidity! Along with my pollen allergies, my skin is left unbelievably dry and uncomfortable, even with regular toning and moisturizing. I'll be so glad once I figure out exactly what I need for my skin in this slightly dryer, cooler climate.
-------------------------------------------------------------------------------------------------------------
Spa Night: For Raznoggle 5/06/2010
This post is especially for a fellow blogger at Raznoggle.com, a dear friend of mine who is dealing with some skin changes in her pregnancy. I promised I'd recommend some homemade spa products for her skin type and here they are! Everything here is for dry, sensitive skin with a focus on smoothing, healing and hydrating.
Three steps to happy skin:
Step 1: Remove dead cells and make room for new growth
Unveil your sweet new skin: If you don't want to make a huge batch of sugar scrub, you can still get the benefits of using this natural exfoliator in your daily skin cleansing and save the majority of kitchen sugar for your coffee!
Lather up your face with your favorite cleanser, then take a small handful of granulated sugar (just a few tablespoons will do) and massage the granules all over your skin for about 30 seconds. Be extra gentle around the sensitive nose and eye area. Rinse off the soap and sugar to reveal smoother, baby soft skin. I use this every day and love it as an alternative to buying expensive scrubs.
Step 2: Nourish your skin with a moisturizing mask. Now that the older dull skin has been sloughed off, let's pamper the new cells and set them up to be moisturized and glowing! I've got three of my favorite masks for you to choose from.
Quenching Mask for smooth, moisturized skin 1/2 small avocado
1/4 cup Honey
-Peel and mash avocado and add honey until you have a thick paste.
-Apply to clean skin and leave on for 15 minutes
-Rinse with cool water.
Skin should feel beautifully soft and quenched!
*This is the mask I"ll be doing tonight. Yay!
Soothing Moisture Mask to heal, soothe and hydrate  1 Tbs plain yogurt (w/ live enzymes is best. Hey! a reason to make Crockpot Yogurt! Haha)
Honey
1 Tbs oatmeal
The finer you can get the oatmeal the better. I've used a blender before to blend half a cup of oatmeal almost to a powder, then set aside the remainder in a zip top bag for future spa treatments.
-Warm a spoon by placing in a mug of hot water for 2 minutes.
-Add 4 to 5 drops of honey to the spoon, so honey will be well warmed.
-In a small bowl, mix yogurt and oatmeal with your honeyed spoon until all ingredients are well blended.
-Apply to clean face and neck, massaging with fingertips to stimulate circulation.
-Relax for 15 minutes as your mask sets. Rinse with warm water and apply moisturizer.
Enjoy your silky smooth, freshly nourished skin!
*This yogurt honey mask is a favorite of mine. My skin feels so silky afterward!*
Deep Conditioning Mask for skin that needs moisture - quick!
1/2 Avocado.
Extra Virgin Olive Oil
-Peel and mash avocado.
-In small bowl, mix in olive oil 1 Tbs at a time until you have a smooth, spreadable paste.
-Apply to clean face and neck. Let it soak into thirsty skin for 10-15 minutes.
-Remove with warm water and revel in your kissably soft, newly conditioned skin :)
*I've used this in the winter for quick hydration. It works wonders!
Step 3: Apply toner and/or moisturizer and enjoy. You're done! It will be hard not to keep touching your baby soft skin :)
Soothing Toner

The best toner for dry or sensitive skin is the simplest. Green tea! Brew a cup and keep it in the fridge. Apply onto freshly cleansed skin before you moisturize. Replace every 3 to 4 days with a fresh batch.
Witch hazel is also a great gentle toner, but is a little more drying than green tea.
FUN FACTS:
Honey is a naturally gentle cleanser that will aid in healing and leave your skin soft and smooth.
Yogurt, another natural antibacterial, soothes and softens, locking in moisture.
Oatmeal will soothe irritated or dry skin that is developing sensitivity.
Avocado and Extra Virgin Olive Oil are amazing deep conditioners. Use on hair and skin for great results!
Green tea is a wonderful antioxidant that can also soothe dry skin. It's rumored to have anti-aging qualities as well.
SWEET TIP: If dry skin is extremely sensitive and becomes irritated when wearing homemade masks, apply a thin layer of warm honey to skin and then apply the mask on top of that. The honey will act as a breathable filter for your skin, softening and cleansing while allowing the mask ingredients to seep through and work through the protection of the honey 'shield'.
------------------------------------------------------------------------------------------------------------- Homemade Egg White Toning Mask
Ready for some pampering? I am! Tonight I'm doing another Olive Oil Deep Conditioning Treatment, a pedicure and an Egg White Toning Mask.
Here's my recipe for an Egg White Toning Mask so you can try it yourself. This is great to perk your skin up for an event, date, or family photos. Use a few hours before your event for glowing, firmer skin with or without makeup. For regular skin care, may be used once a week. When pressed for time, I use the egg whites lightly beaten, not thick enough to form peaks. The benefit of whipping it, though, is that the chances of egg white dripping down your neck as it dries is greatly reduced. Bottom line: whipped or lightly beaten, the end result is the same. Tightened pores and smoother skin.
EGG WHITE TONING MASK
Ingredients:
Favorite cleanser
Favorite face scrub. One of these days I'll post my recipes for sugar and salt scrubs.
Facial moisturizer
1 cold egg. I like it cold because it feels soothing on my skin.
Electric mixer. Because I'm lazy and will not hand whip this mask!
Vanilla extract. If the thought of smelling raw egg whites on your face makes you squeamish.
Directions:
-Cleanse face thoroughly.
-Exfoliate skin with scrub. Rinse. Pat dry.
-Separate egg yolk from the white. You will only need the white for this toner.
-In a medium bowl, whip egg white until it's all frothy. If the smell really bothers you (it bothers me some times more than others) this would be the time to add one drop of pure vanilla extract for a more pleasing scent.

-Apply to clean face and do something relaxing while your mask dries. I usually put on some music and curl up with a book.
-Rinse thoroughly and pat dry. You've got to touch your skin to believe it! It will be smoother, tightened and refreshed.
FUN FACTS
-Over time, this mask can help your pores appear less visible.
-Add 1 tbsp of honey before whipping to create a mask that can heal as well as tighten.
-Honey is a natural antibacterial, helping any open blemishes to heal and with continued use, is great for unclogging pores.
Now, obviously, taking care of a very active little boy and the normal routine of running a household doesn't always add up to uninterrupted blocks of time for spa treatments. Because I'm generally in a better mood the rest of the week when I take time for myself, I use what I have. And that usually means breaking up the time I use into realistic increments. For instance, today, when Baby Boy went down for a nap, I did the Hot Oil Treatment and Egg White Mask. I have other things to get done for the remainder of naptime so, I'll leave the pedicure for later on tonight when Little Man's down for the night. That way neither Baby Boy, the house, or I suffer :) Anyway, just thought I'd throw that out there to encourage you to make time for yourself because the relaxation is worth the effort. Happy Spa Night!
-------------------------------------------------------------------------------------------------------------
Rice Water Toner 4/29/10
Can you believe that I might have had one of the oldest beauty secrets in my kitchen all my life and never knew it? I've been researching ancient beauty techniques and what people in different cultures use from their kitchens for skin care and wow, how have I never heard of a Rice Water Toner? It is so easy to make, too! And apparently has a world of benefits. So, to this day, in many Asian households, when the daily pot of rice is made, a cup or two of the rice water is set aside for the mother or daughter's nightly face washing. Interesting! I think it's pretty awesome. I've read that with long time use it can brighten skin, even out skin tone and tame oily patches. That's great news for my uneven, oily skin! It also has a reputation for lightening freckles, but I think that may be a myth. Would be nice, though, if it could remove freckles. I have lots of those! The best versions use organic rice, but um, yeah, that's a little too pricey for me. I still wanted to try it, just with regular rice. Here's what I used:
Rice Water Toner
White rice
Rice pot
Warm water
Ladle
Container with lid
Directions
-Add rice to rice pot.
-Cover with about 1 inch water.
-Swirl rice around until the water gets cloudy
-Let sit 5 minutes.
-Ladle rice water into container.
-Keep covered in fridge for 1-2 days.
-SHAKE WELL before each use. -Apply to clean face and neck and let dry. May be used before makeup application and after makeup removal.
Optional: I added 2 drops of tea tree oil before placing in the fridge. Tea tree oil is a natural antibacterial so I'm hoping it will fight the bacteria and make the toner last longer than 24 hours. At least until I make another pot of rice! I'll let you know if it works :)

Look how much rice water could be collected from rinsing one pot of rice! Wow. If it could last longer, this would be the cheapest kitchen beauty treatment ever!

There are so many more sophisticated Asian beauty products that can be purchased that offer beautiful results. But rice water caught my interest because the cost is so reasonable (we always have rice!) and it's still being used by people today.
Oh yeah, after squirreling away the water, don't forget to add more and cook the rice!
Feel free to browse, use and share my collection of homemade spa recipes below. Don't forget to link back to my blog. I share a new Spa Night post every Thursday and will be adding each recipe to this page for easy access. Make time to pamper yourself this week! You won't regret it. Happy Pampering!
- Driftwood Girl
Disclaimer: All homemade beauty products and results are based on my own use and experience. The facts included about these cupboard products are only a few benefits/risks. Use responsibly. I cannot be held liable for any allergic or adverse reactions experienced while using recommended ingredients. No skin treatment presented on this website is intended to be used in place of a doctor or dermatologist's advice. For personal use or gifts only, not intended for sale.
------------------------------------------------------------------------------------------------
Spa Night: Homemade Conditioner for Hair Growth
My wonderful friend and sis Rachel @ Raznoggle.com sent me the link for thishomemade hair conditioner. I don't have all the ingredients, but will definitely be trying this when I do. Check your cabinets! You might be able to do this for your spa night, and if you do, please let me know how you liked it.
Homemade Conditioner - For hair growth
Things You'll Need:
1/4 cup of plain natural yogurt
1 egg yolk
1 tsp. fresh lemon juice
8 to 10 drops of eucalyptus oil
Directions:
Place the natural yogurt in a small bowl. Yogurt is not only the creamy base of your natural conditioner, but it is also a gentle cleansing agent that will help to clear pores. Yogurt has natural anti-fungal and anti-bacterial properties that will gently wash away the dirt and grime that inhibits hair growth.
Separate the egg white from the yolk and add the yolk to the yogurt. Egg yolk is a natural and deep-penetrating moisturizer that will not only make your hair silky smooth, but also help add elasticity and strength, so that as your hair grows it will break less.
Add 1 tsp. of fresh lemon juice to the mixture. Lemon is a natural astringent that will help to remove shampoo and product build-up. Lemon, the same pH as your hair's natural oil, can help protect and seal the hair's cuticle, preventing split ends.
Mix in 8 to 10 drops of eucalyptus oil and stir until creamy. Eucalyptus oil has a cool, refreshing effect on the skin and will help to stimulate blood circulation on the scalp, encouraging hair growth.
Wet your hair thoroughly and apply the conditioner. Massage the conditioner into your scalp gently for at least five minutes. For deep penetrating conditioning, you can wrap your head in a towel and allow the treatment to set for 20 to 30 minutes. When ready, rinse your hair and towel dry.
Click here to be taken to the original eHow article.
Have you taken some time to relax this week? I admit I really need to get my spa night in, it's been a long week!
Psst... thanks, Rachel for the recipe! I can't wait to try it.
Happy pampering!---------------------------------
Spa Night: Easy Homemade Sugar Scrub
My easy recipe for a sugar scrub.
1 cup salt or 1 cup granulated sugar
2 Tbs olive oil or liquid coconut oil
2 tsp honey
3-5 drops of essential oil of your choice (optional for added benefit)
-Mix all ingredients well to evenly distribute the honey and oil.
Think of the lucky dates he will wow with his fabulous spa gifts ;)
Aahhhh.... I love the smell of brown sugar.
-Transfer to tightly lidded container of your choice.
That's it! Look at you, you fabulous homemade beauty! Can you believe you used to pay for this??
Hey, with a name like Smucker's it has to be good, right?
Come back tomorrow for a post on how to get those annoying labels off your recycled jam jar. The easy way!
-For a thinner scrub, add more liquid ingredients a bit at a time until it reaches the desired consistency.
Great on rough spots (knees, elbows and feet) and safe for facial exfoliation too!
NOTE: As with any scrub, be very gentle on sensitive areas around the eyes and nose.
FUN FACTS:
-I added the honey to work as a natural preservative and skin softener and it works amazingly well. This scrub will keep for months and travels well if you want to ship a batch as a gift.
-Salt is great as a scrub, but I prefer sugar because it's not as drying to my skin.
-Olive and coconut oils have been used for centuries as a natural conditioner for both skin and hair. Knowing how to use oils in your beauty treatments can give you a beautiful healthy glow! Click here to read about a way to use these oils instead of chemical laden face washes. That's right, oil to cleanse your face!
This is a basic scrub and you can build on it any way you wish.
As you get more comfortable making it, you can add food coloring to a scrub made with white sugar for a fun presentation. For a little more luxury, add dried herbs and a drop or two of fragrance and essential oils.
Be careful with fragrance and essential oils in a face scrub. A tiny bit is enough! Too much can cause break outs. Fragrance oils are delicious in body scrubs, though and the right scent can enhance the spa experience.
Who says you have to pay a lot for that luxurious body scrub at the store? Make your own for pennies and enjoy creating your very own homemade spa! Hey, you don't even have to drive there!
Have you taken time out for yourself this week? I guarantee, you won't regret it.
Happy pampering, Beauties!
PS
Many of you amazing people already know how to make sugar scrub. What are your favorite ingredients?
----------------------------------------
Spa Night: Rice Water Toner with a Cheapskate Twist! 8/05/2010
I wanted to share this amazingly simple but exponentially brilliant tip sent to me by Barbie @ Adventures of a Wannabe Cheapskate. Remember how much I love Rice Water Toner? You'll also remember how it usually keeps only for a few days so I added tea tree oil to mine, which enabled usage for up to two and a half weeks with no problems. Alright, there's one problem. Tea tree oil is expensive! Well, Barbie came up with a different (and cheaper!) way to make her Rice Water Toner last. In the freezer! No kidding. Awesome, right? Since learning this tip, I am able to save my tea tree oil for other projects and can still enjoy the benefits of rice water! Here it is, in her own words:
I wanted to tell you how much I love the rice water toner.... I tried it, and really like it. I ran out and didn't make any for a while, and I can really tell the difference. I made it a priority recently to make some more. I don't have tea tree oil... When I made it most recently, I poured it into an ice cube tray and froze it. When it was completely frozen, I emptied the tray into a ziploc and stored that in the freezer. I take one ice cube out and put it in a cup in the fridge to melt overnight. I find that the ice cube size is just right for a morning and evening use. So, that's my own cheapskate twist on rice water toner. I love it! And I love that super cold feeling of fresh-from-the-fridge toner. Everybody should keep their toner (no matter what kind they use) in the freezer!
I totally agree, Barbie! I always kept my Healing Toner in the fridge. Even when I used plain witch hazel, it was stored in the fridge for that fresh, cool feeling. I love Barbie's tip because it's so practical, which is what beauty treatments need to be when you're busy enjoying life. So, thanks for the great tip! It has made having my rice water even more frugal and it lasts a whole lot longer.
Using the rice water ice cubes has been a huge time saver for me! I love to swipe the ice cube over my clean skin in the morning for a refreshing wake up call that's good for my skin too. Using it this way in also helps to reduce my morning companion: puffy eyes. I use half of it in the morning and toss the rest of the ice cube into a ziptop snack bag back in the freezer.
In the evening, to finish off my Oil Cleansing Method, I swipe the rest of the ice cube over my face and neck until it's gone. Aaahhh.... very relaxing.
Do you love homemade skincare? If something doesn't work at first, tweak it! You might find a fabulous new way that works for your unique skin situation. Or maybe, like Barbie, you'll find an all around better way of doing things. That's what is so wonderful about making your own products. You can adjust ingredients, preparation, and consistency to suit you. And that, my friend is a beautiful thing!
----------------------------------------
Spa Night: Oil for Facial Cleansing 7/29/2010
Using oil instead of soap to cleanse your face? This website is filled with extensive information on this ancient but now almost unheard of method for clear, beautiful skin! I found that reading what people who have actually used it are saying has been helpful too. The idea that something so simple could be so much better than all the technologically advanced cleansers we have now is definitely enough to pique my interest.
Here are some of the questions I initially had and the answers I've found:
How is the cleansing done?~A quarter sized amount of natural oil is massaged vigorously onto face for at least 5 minutes. This motion loosens the hardened material in enlarged pores and with continued use will remove them completely.
~Makeup doesn't even need to be removed before doing this, the oil will remove it, even mascara.
~Once the massage is over, gently wipe the oil off with a hot steamy washcloth, rinsing the towel and wiping until all oil is removed. This is important. Remove all of the oil, even if you didn't wear makeup. The oil on your face is now dirty and leaving it on your face might cause more problems. That's it. No need to rinse. Toner and a bit of clean oil as moisturizer and you're ready for bed.
~In the morning, use a clean washcloth to gently wash your face with water only.
How often is this done in order to see results?~Once a day before bedtime.
Why oil?~The whole premise is that commercial facial cleansers strip skin of it's natural oils. In response, skin overcompensates by producing too much oil which clogs and enlarges pores.
~The oil used is pure and natural and extremely good for skin care. Castor oil, extra virgin olive oil, virgin coconut oil, etc.
~Oil gently cleanses the pores by loosening built up dirt and oil clogging the pores. Removing these blemishes without stripping moisture from the face is key! Facial skin is left invigorated (from the massage) and gently deep cleaned.
Does it work?Many people have seen significant improvement in their skin with the Oil Cleansing Method (OCM) including: Disappearance of blemishesEven skin toneUnbelievably soft skinDisappearance of blackheads/whiteheadsReduced dark circles under eyesPlumper, younger looking skin
What type of skin has it worked for?Combination skinNormal skinOily skinAcne prone skinDiagnosed rosaceaSufferers of psoriasis
So what are your thoughts? Would you try it?
Yesterday was my second day on OCM (using virgin coconut oil. Thanks to my awesome Mom!) and I'm excited to already see results. My pores are shrinking and unclogging, the whole kaboodle. I have combination skin. Very oily in the Tzone with very dry patches scattered everywhere else. As my skin is adjusting to not being dried out or overproducing oil, I'm happy to see my Tzone isn't so oily and there are definitely no more scaly dry patches! After two days! So, needless to say, I'm sticking with it and hoping for much better long term results.
-----------------------------------------
Spa Night: Give Up Shampoo?? 7/22/2010
Alright, here's a topic that is potentially cringe worthy but I think is worth a try: Give up shampoo and conditioner in favor of a more frugal hair cleansing regimen.
Could you do it? Could you go without shampoo and conditioner? You know what? I'm up for it.
You can read up on the pros and cons of going without oil stripping commercial shampoo in the same post I stumbled on by Alison @ Wholesome Goodness.
I've already been using my Vinegar Shine Rinse in place of dandruff shampoo and have loved the disappearance of flakes! So, I think this is the next step to healthy hair. Basically, here's what I'll be using:
In place of shampoo- Baking soda and water
In place of conditioner- Apple cider vinegar and water
Here are the basics that have me intrigued:
-Commercial shampoos are too harsh and strip the hair of natural oils.
-After a (very) greasy transition period that could last 2 weeks to 2 months, your hair will find it's natural balance and look it's best.
-Baking soda is a gentle cleanser that's good for the earth, your hair and your wallet!
-Vinegar will restore the PH balance in your hair, stimulate the smaller capillaries in the scalp and lock in shine.
Here's marking day 1! No shampoo or conditioner starting today. I hope I can stand it long enough to get through the greasy adjustment period.
Here's how my hair looks today after using baking soda and vinegar for the first time yesterday:
So far, no signs of overt greasiness. I can't believe the shine! It doesn't even shine like that after a homemade Hot Oil Treatment!
Looking forward to seeing how this all works out. I"m excited that this frugal solution might actually be better for my hair. So, would you try it?
--------------------------------------
Spa Night: Brightening Mask
Here I am with my mom, who was such an amazing good sport during her recent visit. She got a crash course in homemade relaxation! It was tons of fun and we got amazing results. I've used the mask pictured here before, but never posted the recipe, so here it is, a homemade brightening mask.
Brightening Mask
-1/4 cup plain yogurt (ooh, homemade yogurt comes in handy!)
-2 Tbs honey
-1/2 tsp turmeric
-flour
STEP 1: In a small bowl, combine yogurt, honey and turmeric until well combined.
STEP 2: Add a teaspoon of flour at a time, stirring after each, to form a thick spreadable paste. Think facial masks you buy in the store and go for that consistency, like thick mayonnaise.
STEP 3: Apply evenly over freshly washed face, massaging into skin. Let dry for 10-15 minutes as flour tightens the mask.
STEP 4: When dry, remove the mask by scrubbing with a warm, moist washcloth. This is an extra polishing step, removing dead skin cells. Rinse well and apply your favorite toner and a gentle moisturizer.
Enjoy your brightened, smooth as silk skin!
FUN FACTS:-The use of turmeric in facial masks has shown improvement in psoriasis and inflammatory skin conditions, evening out skin tone and promoting healing of open blemishes. Awesome, right? And there are a whole world of amazing things it does for your body when used regularly in cooking.-Honey is one of my favorite at home antibacterials and skin softening agents!-Yogurt is full of healthy bacteria and is another gentle softener.-Use this mask once a week for gradual, brightening results.
Don't forget to take time for yourself this week! Here's hoping you're able to grab a relaxing moment. Happy pampering!
------------------------------------------------------------------------------------------------------------------------
Early Spa Night Post: Healing Liniment Recipe
I played around with the ingredients in the Healing Toner, increasing the measurements to create a healing liniment for my dad.
The liniment worked really well in conjunction with my very first Healing Salve. I'd never made anything like that before and was so excited with how it turned out! Here's a peek at the salve made of:Beeswax, olive oil, vitamin E, tea tree oil, lavender essential oil, calendula and chamomile. Woohoo! Yes, seriously, those are all the ingredients. No chemicals! It was ultra healing and chock full of natural goodness. It smelled lovely, very natural and herbish and worked amazingly well. I love it so much that I'm going to make it regularly to use as diaper rash cream for Baby Boy. Anyway, not to get off topic, but I hope to post a recipe for the salve soon!
Here's the Healing Liniment recipe if anyone wants to give it a try. Enjoy!
Healing Liniment
-Freshly brewed green tea
-Witch hazel
-Tea tree oil
-Water
Just remember, 3-2-1.
In a container of your choice, add 3 parts cooled green tea, 2 parts witch hazel and 1 part water.
Add 1/2 tsp tea tree oil and shake well to combine
Store in an air tight container in the fridge for up to 2 weeks.
Remember to shake well before each use to redistribute the tea tree oil, which will float on top after sitting.
Apply to freshly cleansed skin to heal, cool and soothe sore muscles or open wounds.
Easy, right? Here are some FUN FACTS:Tea tree oil- Natural antibacterial, and a gently powerful healing and cleansing oil.Witch hazel- Successfully used as pain relieving topical treatment for bruises, insect bites, sunburn, minor burns, poison ivy, hemorrhoids, varicose veins, stiff muscles and blemishes. Wow! Don't you just love this stuff? NOTE: Guys, witch hazel is a fantastic natural aftershave. Ladies, on it's own it's an amazing toner you can use before makeup application or after makeup removal.Puffy eyes? Soak cotton pads in witch hazel and rest them on your closed eye lids for 10-15 minutes for a quick refresher.Green tea- Believed to have both healing and anti-aging properties.
Let this serve as an early reminder to make time to relax this week! Happy future pampering!
----------------------------------------------------------------------------------------------
Sweet Little Facial:
-Honey
-Favorite facial cleanser. I love this homemade castile soap bar I brought home from our South Pacific vacation last Christmas.
-A teaspoon of granulated sugar.
STEP 1: Lather Up! Using warm water to open up pores, lather up face and neck with cleanser.
STEP 2: Exfoliate. Pour sugar into your hand and massage into face, using the suds to distribute it evenly. Apply light, even pressure, working all over around the hairline, eyes, nose and mouth. Don't forget the neck.
STEP 3: Rinse well and pat dry.
STEP 4: Apply honey as a mask all over face and neck, making sure to apply thinly on forehead, so it doesn't drip into your eyes as you let it set. Leave on for 15 minutes. Rinse and pat dry before applying toner and moisturizer.
----------------------------------------------------------------------
Cucumber Mask:
Playing around with some new ingredients. I've found the best way to find new original recipes is to mix 'em, slap 'em on, and hope for the best! Here's my twist on an old favorite:
Cucumber Mask:
-1 Tbs kefir
-1 Tbs oatmeal. Get it as close to powder form as possible in a food processor, pestle, or roughly chopped for more exfoliation.
-1 whole cucumber
-2 tablespoons plain yogurt or sour cream
-1 teaspoon honey
Mix together the kefir and oats in a small bowl and set aside.
Peel cucumber and use a blender to liquefy.
Add honey and yogurt. Blend well.
Gently mix in kefir/oats to combine.
Apply to clean face and neck and relax with a book or soothing music for 15-20 minutes.
Rinse and finish up with toner and moisturizer.
-------------------------------------------------------------------------------
Spa Night: Peppermint Foot Scrub & Cucumber Water Review 6/03/2010Tonight's homemade spa recipe is for a Peppermint Foot Scrub! Click here to read some of the great things peppermint oil can do for your health. I love using essential oils and peppermint is one of my favorite in home spa treatments. Personally, peppermint oil has been wonderful applied at the temples and between the eyes to treat a migraine. That and a firm massage to the center of the hairline along the neck can make a migraine manageable. My SIL asked me for a spa treatment recipe and I thought I'd share it here since it's perfectly suited for the sweltering heat. Hobby Lobby carries all sorts of essential oils for about $6 each. Next time you're at the store, pick up the ingredients and enjoy a refreshing foot scrub that feels great on hot summer feet!
This recipe makes enough to fill eight 8 oz jars, so make ahead for yourself to enjoy all summer long, or give them out for a girl's day, hostess gift, or to your guests at your summer barbeque. One of the best things about this scrub is the peppermint oil makes it tingle :) Aaahhhh.....
Peppermint Foot Scrub2 lbs coarse salt (can use sea salt or epsom salts)
32 oz olive oil (or almond oil)
33-40 drops peppermint pure essential oil (depending on how strong you'd like it)
-In a large glass bowl, mix salt and oil
-Add peppermint oil. Mix until well incorporated.
-Transfer to jars with lids
-To be used only as a foot scrub.
-Indulge after a warm foot soak. Scrub, rinse, pat dry.
-Enjoy your fresh smelling, cooled off feet! -For dry skin, apply moisturizer after drying to keep your feet looking great.
Cucumber Water Review
I wrote last Spa Night, how I wanted to try Cucumber Water and when I went to the grocery store this week, I just had to grab a few cucumbers for the recipe. Here's a tutorial in photos and review:
Peel and chop up 1 whole cucumber. I sliced it into pieces that would fit into the jug I was using.
Add cucumber to regular water with lemon juice.I know in home therapy lemon juice in small quantities can be substituted for vinegar, so I didn't pick up lemons because I had vinegar. A few drops of white vinegar went into the mix. You just need the acidity to help the cucumber juice extraction along.
I used peppermint oil instead of fresh mint, mainly because there was none to be found when I went shopping.So, here's where I messed up. I know 2 to 3 drops of peppermint oil in an 8 oz glass of water will settle a gassy/upset stomach. So, I figured 10 drops to 3/4 gallons of water would be fine, right? Wrong!
Let your cucumber water sit covered in the fridge for 24 hours. After that, you can either remove the cucumber pieces or keep them in. I left mine. Serve in tall glasses garnished with a fresh slice of cucumber.
REVIEW: Whoa! Hubby avoids this stuff like poison after his initial taste. And once I tasted it, I understood. 10 drops of peppermint oil was way too much. It was like drinking vapor rub that cleared your sinuses and maybe singed a few taste buds. But, that isn't the recipe's fault. I apparently need to experiment some more to find the right balance. So, I'm still drinking the peppermint water as Hubby calls it, just watered down. A lot. I will put about half an inch of the cucumber water in a glass and fill it the rest of the way with plain water. Then it's drinkable and quite refreshing, but that doesn't stop Hubby from fondly calling me 'Pepomint breath' every time he kisses me. So, I guess, all in all, the recipe went well, and having it so concentrated will make it last a long time :). And hey, pepomint breath is better than halitosis any day.
Don't forget to make time for yourself this week. You'll be able to complete projects or take care of your family with a much happier heart. Happy pampering!-------------------------------------------------------------------------------------------------------------
Spa Night: Cucumber Water 5/27/2010
One of my favorite couponing blogs, Hip2Save, posted ideas for an at home Spa Day! Great minds, y'all. Head on over here to read the complete post and get some delicious sounding recipes to add to your Home Spa experience. I've included the one recipe from Hip2Save that I'm especially dying to try. I just need to pick up some cucumbers the next time I'm at the store. Then hello, relaxation!
Cucumber Water
In order for the cucumber to fully release its juice, you need to prepare it the day before your event.
1 cucumber, sliced and unpeeled + 6-7 cucumber slices for decoration
1 1/2 to 2 liters of water
3 mint sprigs + 2 mint sprigs for decoration
Half a lemon, sliced and unpeeled
Ice cubes
In a pitcher, mix the water, cucumber, 3 mint sprigs and lemon. Let it rest on the fridge for 24 hours. If you prepare the water at the last minute, cut the first cucumber in three or four pieces. Then, squeeze the cucumber pieces to release all the juice. Before serving remove the cucumber slices used to flavor the water. Then stir with a wooden spoon, add some ice cubes, 6 or 7 fresh cucumber slices and the remaining 2 mint sprigs.
If you haven't taken the time to consciously relax this week, what are you waiting for? Your peace of mind will thank you. Happy Pampering!
-------------------------------------------------------------------------------------------------------------
Spa Night: Acne Spot Treatment 5/20/2010
I'm so ready for spa night! Hubby and I worked so hard on Tuesday, cleaning our apartment from top to bottom and doing the huge pile of laundry. It was a long day, but so worth it because our new home is finally organized! Yesterday, I only had to do every day cleaning to maintain the place the way I like it. I had so much free time it was ridiculous. All the extra time got me thinking about tonight's spa treatment as well as starting on designing a more peaceful space in which to do spa treatments. But more on that later.
I am in need of a homemade spa treatment because I am breaking out like crazy. Tea tree oil applied with a qtip has been great for me, but I want to learn to make use of different ingredients I always have in the kitchen. I'm really interested in finding a leave on night treatment. A quick search brought up a popular homemade acne spot treatment that I had never heard about: Cinnamon, nutmeg and honey. This is such great news to me because it makes use of ingredients I almost always have in my cabinets.
I'm naming my version:
Holiday Spice Acne Spot Treatment
1/2 tsp ground cinnamon1/2 tsp ground nutmegHoney
-In a small container, mix well cinnamon and nutmeg
-Add and mix honey drop by drop, until a very thick paste is formed.
-Spot apply onto blemishes after cleansing and patting dry.
-Leave overnight and rinse off in the morning.
Here's a bonus recipe for you as well, which is rumored to heal blemishes quickly, leaving smooth skin with no scarring! We'll see if it works :)
Miracle Acne Spot Treatment
1/2 tsp ground nutmeg
Milk
-In a small container, add milk drop by drop to nutmeg, mixing to form a thick paste.
-Spot apply onto blemishes after cleansing and patting dry.
-Leave overnight and rinse off in the morning.
Neither of these treatments had specified measurements, but recommended only making enough for one or two uses. That way you would be sure to use fresh treatments to ensure great results. I've used honey in many homemade spa recipes, but after researching the benefits of the new ingredients, I've estimated the amounts needed.
-------------------------------------------------------------------------------------------------------------
Spa Night: Chamomile Steam 5/13/2010
Aaahhhh....Thursday. I've missed you so. Right now, while Baby Boy's down for a nap, I've done a Chamomile Steam followed by a Quenching Mask. If you want to try it yourself, just follow these steps to relaxation:
Have the mask you will use following the facial steam ready before hand.
Chamomile Steam:Hot waterChamomile tea bagTea tree oilMedium bowlBath towelSome sort of timer. I just use the one on my microwave or stove.
-Use a headband or tie hair in a pony tail to keep it out of your face.-Boil enough water to fill your bowl.-Place tea bag in the bowl, pour boiled water and let steep 2 minutes.-Add 2 to 3 drops tea tree oil to water. Do not remove tea bag.
-Place bowl on a table at a comfortable height that will allow you to lean over the bowl, using your forearms for support.-Put on some soothing music or (if your little one is sleeping) relish in the beautiful phenomenon of silence.-Set a timer for 10 minutes.-Position your face over the bowl of water and drape the towel over your head to form a mini sauna.-Breathe in the soothing steam and relax as your pores open up.-When timer goes off, apply Quenching Mask to still warm skin for maximum results.-Rinse, tone and moisturize and you're done! Enjoy your deeply conditioned skin.
FUN FACTS:-Steaming opens up pores, leaving them ready to receive all the goodness you want to slather on as beauty treatments. You can steam to maximize the results of a scrub, mask, toner, etc.-Add your favorite essential oil or herbal tea for a pleasant steaming experience. You can use plain water, but it feels so much more luxurious (and relaxing) when you're breathing in a soothing fragrance.-Steaming regularly can loosen dried oils and black heads that clog pores, making your after steaming treatment that much more effective.-DO NOT forget to apply moisturizer after steaming.
I really need to do this because of the lack of moisture in the air. This island girl needs humidity! Along with my pollen allergies, my skin is left unbelievably dry and uncomfortable, even with regular toning and moisturizing. I'll be so glad once I figure out exactly what I need for my skin in this slightly dryer, cooler climate.
-------------------------------------------------------------------------------------------------------------
Spa Night: For Raznoggle 5/06/2010
This post is especially for a fellow blogger at Raznoggle.com, a dear friend of mine who is dealing with some skin changes in her pregnancy. I promised I'd recommend some homemade spa products for her skin type and here they are! Everything here is for dry, sensitive skin with a focus on smoothing, healing and hydrating.
Three steps to happy skin:
Step 1: Remove dead cells and make room for new growth
Unveil your sweet new skin: If you don't want to make a huge batch of sugar scrub, you can still get the benefits of using this natural exfoliator in your daily skin cleansing and save the majority of kitchen sugar for your coffee!
Lather up your face with your favorite cleanser, then take a small handful of granulated sugar (just a few tablespoons will do) and massage the granules all over your skin for about 30 seconds. Be extra gentle around the sensitive nose and eye area. Rinse off the soap and sugar to reveal smoother, baby soft skin. I use this every day and love it as an alternative to buying expensive scrubs.
Step 2: Nourish your skin with a moisturizing mask. Now that the older dull skin has been sloughed off, let's pamper the new cells and set them up to be moisturized and glowing! I've got three of my favorite masks for you to choose from.
Quenching Mask for smooth, moisturized skin1/2 small avocado
1/4 cup Honey
-Peel and mash avocado and add honey until you have a thick paste.
-Apply to clean skin and leave on for 15 minutes
-Rinse with cool water.
Skin should feel beautifully soft and quenched!
*This is the mask I"ll be doing tonight. Yay!
Soothing Moisture Mask to heal, soothe and hydrate 1 Tbs plain yogurt (w/ live enzymes is best. Hey! a reason to make Crockpot Yogurt! Haha)
Honey
1 Tbs oatmeal
The finer you can get the oatmeal the better. I've used a blender before to blend half a cup of oatmeal almost to a powder, then set aside the remainder in a zip top bag for future spa treatments.
-Warm a spoon by placing in a mug of hot water for 2 minutes.
-Add 4 to 5 drops of honey to the spoon, so honey will be well warmed.
-In a small bowl, mix yogurt and oatmeal with your honeyed spoon until all ingredients are well blended.
-Apply to clean face and neck, massaging with fingertips to stimulate circulation.
-Relax for 15 minutes as your mask sets. Rinse with warm water and apply moisturizer.
Enjoy your silky smooth, freshly nourished skin!
*This yogurt honey mask is a favorite of mine. My skin feels so silky afterward!*
Deep Conditioning Mask for skin that needs moisture - quick!
1/2 Avocado.
Extra Virgin Olive Oil
-Peel and mash avocado.
-In small bowl, mix in olive oil 1 Tbs at a time until you have a smooth, spreadable paste.
-Apply to clean face and neck. Let it soak into thirsty skin for 10-15 minutes.
-Remove with warm water and revel in your kissably soft, newly conditioned skin :)
*I've used this in the winter for quick hydration. It works wonders!
Step 3: Apply toner and/or moisturizer and enjoy. You're done! It will be hard not to keep touching your baby soft skin :)
Soothing Toner
The best toner for dry or sensitive skin is the simplest. Green tea! Brew a cup and keep it in the fridge. Apply onto freshly cleansed skin before you moisturize. Replace every 3 to 4 days with a fresh batch.
Witch hazel is also a great gentle toner, but is a little more drying than green tea.
FUN FACTS:
Honey is a naturally gentle cleanser that will aid in healing and leave your skin soft and smooth.
Yogurt, another natural antibacterial, soothes and softens, locking in moisture.
Oatmeal will soothe irritated or dry skin that is developing sensitivity.
Avocado and Extra Virgin Olive Oil are amazing deep conditioners. Use on hair and skin for great results!
Green tea is a wonderful antioxidant that can also soothe dry skin. It's rumored to have anti-aging qualities as well.
SWEET TIP: If dry skin is extremely sensitive and becomes irritated when wearing homemade masks, apply a thin layer of warm honey to skin and then apply the mask on top of that. The honey will act as a breathable filter for your skin, softening and cleansing while allowing the mask ingredients to seep through and work through the protection of the honey 'shield'.
------------------------------------------------------------------------------------------------------------- Homemade Egg White Toning Mask
Feel free to browse, use and share my collection of homemade spa recipes below. Don't forget to link back to my blog. I share a new Spa Night post every Thursday and will be adding each recipe to this page for easy access. Make time to pamper yourself this week! You won't regret it. Happy Pampering!
- Driftwood Girl
Disclaimer: All homemade beauty products and results are based on my own use and experience. The facts included about these cupboard products are only a few benefits/risks. Use responsibly. I cannot be held liable for any allergic or adverse reactions experienced while using recommended ingredients. No skin treatment presented on this website is intended to be used in place of a doctor or dermatologist's advice. For personal use or gifts only, not intended for sale.
------------------------------------------------------------------------------------------------
Spa Night: Homemade Conditioner for Hair Growth
My wonderful friend and sis Rachel @ Raznoggle.com sent me the link for thishomemade hair conditioner. I don't have all the ingredients, but will definitely be trying this when I do. Check your cabinets! You might be able to do this for your spa night, and if you do, please let me know how you liked it.
Homemade Conditioner - For hair growth
Things You'll Need:
1/4 cup of plain natural yogurt
1 egg yolk
1 tsp. fresh lemon juice
8 to 10 drops of eucalyptus oil
Directions:
Place the natural yogurt in a small bowl. Yogurt is not only the creamy base of your natural conditioner, but it is also a gentle cleansing agent that will help to clear pores. Yogurt has natural anti-fungal and anti-bacterial properties that will gently wash away the dirt and grime that inhibits hair growth.
Separate the egg white from the yolk and add the yolk to the yogurt. Egg yolk is a natural and deep-penetrating moisturizer that will not only make your hair silky smooth, but also help add elasticity and strength, so that as your hair grows it will break less.
Add 1 tsp. of fresh lemon juice to the mixture. Lemon is a natural astringent that will help to remove shampoo and product build-up. Lemon, the same pH as your hair's natural oil, can help protect and seal the hair's cuticle, preventing split ends.
Mix in 8 to 10 drops of eucalyptus oil and stir until creamy. Eucalyptus oil has a cool, refreshing effect on the skin and will help to stimulate blood circulation on the scalp, encouraging hair growth.
Wet your hair thoroughly and apply the conditioner. Massage the conditioner into your scalp gently for at least five minutes. For deep penetrating conditioning, you can wrap your head in a towel and allow the treatment to set for 20 to 30 minutes. When ready, rinse your hair and towel dry.
Click here to be taken to the original eHow article.
Have you taken some time to relax this week? I admit I really need to get my spa night in, it's been a long week!
Psst... thanks, Rachel for the recipe! I can't wait to try it.
Happy pampering!---------------------------------
Spa Night: Easy Homemade Sugar Scrub
My easy recipe for a sugar scrub.
1 cup salt or 1 cup granulated sugar
2 Tbs olive oil or liquid coconut oil
2 tsp honey
3-5 drops of essential oil of your choice (optional for added benefit)
-Mix all ingredients well to evenly distribute the honey and oil.
Think of the lucky dates he will wow with his fabulous spa gifts ;)
Aahhhh.... I love the smell of brown sugar.
-Transfer to tightly lidded container of your choice.
That's it! Look at you, you fabulous homemade beauty! Can you believe you used to pay for this??
Hey, with a name like Smucker's it has to be good, right?
Come back tomorrow for a post on how to get those annoying labels off your recycled jam jar. The easy way!
-For a thinner scrub, add more liquid ingredients a bit at a time until it reaches the desired consistency.
Great on rough spots (knees, elbows and feet) and safe for facial exfoliation too!
NOTE: As with any scrub, be very gentle on sensitive areas around the eyes and nose.
FUN FACTS:
-I added the honey to work as a natural preservative and skin softener and it works amazingly well. This scrub will keep for months and travels well if you want to ship a batch as a gift.
-Salt is great as a scrub, but I prefer sugar because it's not as drying to my skin.
-Olive and coconut oils have been used for centuries as a natural conditioner for both skin and hair. Knowing how to use oils in your beauty treatments can give you a beautiful healthy glow! Click here to read about a way to use these oils instead of chemical laden face washes. That's right, oil to cleanse your face!
This is a basic scrub and you can build on it any way you wish.
As you get more comfortable making it, you can add food coloring to a scrub made with white sugar for a fun presentation. For a little more luxury, add dried herbs and a drop or two of fragrance and essential oils.
Be careful with fragrance and essential oils in a face scrub. A tiny bit is enough! Too much can cause break outs. Fragrance oils are delicious in body scrubs, though and the right scent can enhance the spa experience.
Who says you have to pay a lot for that luxurious body scrub at the store? Make your own for pennies and enjoy creating your very own homemade spa! Hey, you don't even have to drive there!
Have you taken time out for yourself this week? I guarantee, you won't regret it.
Happy pampering, Beauties!
PS
Many of you amazing people already know how to make sugar scrub. What are your favorite ingredients?
----------------------------------------
Spa Night: Rice Water Toner with a Cheapskate Twist! 8/05/2010
I wanted to share this amazingly simple but exponentially brilliant tip sent to me by Barbie @ Adventures of a Wannabe Cheapskate. Remember how much I love Rice Water Toner? You'll also remember how it usually keeps only for a few days so I added tea tree oil to mine, which enabled usage for up to two and a half weeks with no problems. Alright, there's one problem. Tea tree oil is expensive! Well, Barbie came up with a different (and cheaper!) way to make her Rice Water Toner last. In the freezer! No kidding. Awesome, right? Since learning this tip, I am able to save my tea tree oil for other projects and can still enjoy the benefits of rice water! Here it is, in her own words:
I wanted to tell you how much I love the rice water toner.... I tried it, and really like it. I ran out and didn't make any for a while, and I can really tell the difference. I made it a priority recently to make some more. I don't have tea tree oil... When I made it most recently, I poured it into an ice cube tray and froze it. When it was completely frozen, I emptied the tray into a ziploc and stored that in the freezer. I take one ice cube out and put it in a cup in the fridge to melt overnight. I find that the ice cube size is just right for a morning and evening use. So, that's my own cheapskate twist on rice water toner. I love it! And I love that super cold feeling of fresh-from-the-fridge toner. Everybody should keep their toner (no matter what kind they use) in the freezer!
I totally agree, Barbie! I always kept my Healing Toner in the fridge. Even when I used plain witch hazel, it was stored in the fridge for that fresh, cool feeling. I love Barbie's tip because it's so practical, which is what beauty treatments need to be when you're busy enjoying life. So, thanks for the great tip! It has made having my rice water even more frugal and it lasts a whole lot longer.
Using the rice water ice cubes has been a huge time saver for me! I love to swipe the ice cube over my clean skin in the morning for a refreshing wake up call that's good for my skin too. Using it this way in also helps to reduce my morning companion: puffy eyes. I use half of it in the morning and toss the rest of the ice cube into a ziptop snack bag back in the freezer.
In the evening, to finish off my Oil Cleansing Method, I swipe the rest of the ice cube over my face and neck until it's gone. Aaahhh.... very relaxing.
Do you love homemade skincare? If something doesn't work at first, tweak it! You might find a fabulous new way that works for your unique skin situation. Or maybe, like Barbie, you'll find an all around better way of doing things. That's what is so wonderful about making your own products. You can adjust ingredients, preparation, and consistency to suit you. And that, my friend is a beautiful thing!
----------------------------------------
Spa Night: Oil for Facial Cleansing 7/29/2010
Using oil instead of soap to cleanse your face? This website is filled with extensive information on this ancient but now almost unheard of method for clear, beautiful skin! I found that reading what people who have actually used it are saying has been helpful too. The idea that something so simple could be so much better than all the technologically advanced cleansers we have now is definitely enough to pique my interest.
Here are some of the questions I initially had and the answers I've found:
How is the cleansing done?~A quarter sized amount of natural oil is massaged vigorously onto face for at least 5 minutes. This motion loosens the hardened material in enlarged pores and with continued use will remove them completely.
~Makeup doesn't even need to be removed before doing this, the oil will remove it, even mascara.
~Once the massage is over, gently wipe the oil off with a hot steamy washcloth, rinsing the towel and wiping until all oil is removed. This is important. Remove all of the oil, even if you didn't wear makeup. The oil on your face is now dirty and leaving it on your face might cause more problems. That's it. No need to rinse. Toner and a bit of clean oil as moisturizer and you're ready for bed.
~In the morning, use a clean washcloth to gently wash your face with water only.
How often is this done in order to see results?~Once a day before bedtime.
Why oil?~The whole premise is that commercial facial cleansers strip skin of it's natural oils. In response, skin overcompensates by producing too much oil which clogs and enlarges pores.
~The oil used is pure and natural and extremely good for skin care. Castor oil, extra virgin olive oil, virgin coconut oil, etc.
~Oil gently cleanses the pores by loosening built up dirt and oil clogging the pores. Removing these blemishes without stripping moisture from the face is key! Facial skin is left invigorated (from the massage) and gently deep cleaned.
Does it work?Many people have seen significant improvement in their skin with the Oil Cleansing Method (OCM) including: Disappearance of blemishesEven skin toneUnbelievably soft skinDisappearance of blackheads/whiteheadsReduced dark circles under eyesPlumper, younger looking skin
What type of skin has it worked for?Combination skinNormal skinOily skinAcne prone skinDiagnosed rosaceaSufferers of psoriasis
So what are your thoughts? Would you try it?
Yesterday was my second day on OCM (using virgin coconut oil. Thanks to my awesome Mom!) and I'm excited to already see results. My pores are shrinking and unclogging, the whole kaboodle. I have combination skin. Very oily in the Tzone with very dry patches scattered everywhere else. As my skin is adjusting to not being dried out or overproducing oil, I'm happy to see my Tzone isn't so oily and there are definitely no more scaly dry patches! After two days! So, needless to say, I'm sticking with it and hoping for much better long term results.
-----------------------------------------
Spa Night: Give Up Shampoo?? 7/22/2010
Alright, here's a topic that is potentially cringe worthy but I think is worth a try: Give up shampoo and conditioner in favor of a more frugal hair cleansing regimen.
Could you do it? Could you go without shampoo and conditioner? You know what? I'm up for it.
You can read up on the pros and cons of going without oil stripping commercial shampoo in the same post I stumbled on by Alison @ Wholesome Goodness.
I've already been using my Vinegar Shine Rinse in place of dandruff shampoo and have loved the disappearance of flakes! So, I think this is the next step to healthy hair. Basically, here's what I'll be using:
In place of shampoo- Baking soda and water
In place of conditioner- Apple cider vinegar and water
Here are the basics that have me intrigued:
-Commercial shampoos are too harsh and strip the hair of natural oils.
-After a (very) greasy transition period that could last 2 weeks to 2 months, your hair will find it's natural balance and look it's best.
-Baking soda is a gentle cleanser that's good for the earth, your hair and your wallet!
-Vinegar will restore the PH balance in your hair, stimulate the smaller capillaries in the scalp and lock in shine.
Here's marking day 1! No shampoo or conditioner starting today. I hope I can stand it long enough to get through the greasy adjustment period.
Here's how my hair looks today after using baking soda and vinegar for the first time yesterday:
So far, no signs of overt greasiness. I can't believe the shine! It doesn't even shine like that after a homemade Hot Oil Treatment!
Looking forward to seeing how this all works out. I"m excited that this frugal solution might actually be better for my hair. So, would you try it?
--------------------------------------
Spa Night: Brightening Mask
Here I am with my mom, who was such an amazing good sport during her recent visit. She got a crash course in homemade relaxation! It was tons of fun and we got amazing results. I've used the mask pictured here before, but never posted the recipe, so here it is, a homemade brightening mask.
Brightening Mask
-1/4 cup plain yogurt (ooh, homemade yogurt comes in handy!)
-2 Tbs honey
-1/2 tsp turmeric
-flour
STEP 1: In a small bowl, combine yogurt, honey and turmeric until well combined.
STEP 2: Add a teaspoon of flour at a time, stirring after each, to form a thick spreadable paste. Think facial masks you buy in the store and go for that consistency, like thick mayonnaise.
STEP 3: Apply evenly over freshly washed face, massaging into skin. Let dry for 10-15 minutes as flour tightens the mask.
STEP 4: When dry, remove the mask by scrubbing with a warm, moist washcloth. This is an extra polishing step, removing dead skin cells. Rinse well and apply your favorite toner and a gentle moisturizer.
Enjoy your brightened, smooth as silk skin!
FUN FACTS:-The use of turmeric in facial masks has shown improvement in psoriasis and inflammatory skin conditions, evening out skin tone and promoting healing of open blemishes. Awesome, right? And there are a whole world of amazing things it does for your body when used regularly in cooking.-Honey is one of my favorite at home antibacterials and skin softening agents!-Yogurt is full of healthy bacteria and is another gentle softener.-Use this mask once a week for gradual, brightening results.
Don't forget to take time for yourself this week! Here's hoping you're able to grab a relaxing moment. Happy pampering!
------------------------------------------------------------------------------------------------------------------------
Early Spa Night Post: Healing Liniment Recipe
I played around with the ingredients in the Healing Toner, increasing the measurements to create a healing liniment for my dad.
The liniment worked really well in conjunction with my very first Healing Salve. I'd never made anything like that before and was so excited with how it turned out! Here's a peek at the salve made of:Beeswax, olive oil, vitamin E, tea tree oil, lavender essential oil, calendula and chamomile. Woohoo! Yes, seriously, those are all the ingredients. No chemicals! It was ultra healing and chock full of natural goodness. It smelled lovely, very natural and herbish and worked amazingly well. I love it so much that I'm going to make it regularly to use as diaper rash cream for Baby Boy. Anyway, not to get off topic, but I hope to post a recipe for the salve soon!
Here's the Healing Liniment recipe if anyone wants to give it a try. Enjoy!
Healing Liniment
-Freshly brewed green tea
-Witch hazel
-Tea tree oil
-Water
Just remember, 3-2-1.
In a container of your choice, add 3 parts cooled green tea, 2 parts witch hazel and 1 part water.
Add 1/2 tsp tea tree oil and shake well to combine
Store in an air tight container in the fridge for up to 2 weeks.
Remember to shake well before each use to redistribute the tea tree oil, which will float on top after sitting.
Apply to freshly cleansed skin to heal, cool and soothe sore muscles or open wounds.
Easy, right? Here are some FUN FACTS:Tea tree oil- Natural antibacterial, and a gently powerful healing and cleansing oil.Witch hazel- Successfully used as pain relieving topical treatment for bruises, insect bites, sunburn, minor burns, poison ivy, hemorrhoids, varicose veins, stiff muscles and blemishes. Wow! Don't you just love this stuff? NOTE: Guys, witch hazel is a fantastic natural aftershave. Ladies, on it's own it's an amazing toner you can use before makeup application or after makeup removal.Puffy eyes? Soak cotton pads in witch hazel and rest them on your closed eye lids for 10-15 minutes for a quick refresher.Green tea- Believed to have both healing and anti-aging properties.
Let this serve as an early reminder to make time to relax this week! Happy future pampering!
----------------------------------------------------------------------------------------------
Sweet Little Facial:
-Honey
-Favorite facial cleanser. I love this homemade castile soap bar I brought home from our South Pacific vacation last Christmas.
-A teaspoon of granulated sugar.
STEP 1: Lather Up! Using warm water to open up pores, lather up face and neck with cleanser.
STEP 2: Exfoliate. Pour sugar into your hand and massage into face, using the suds to distribute it evenly. Apply light, even pressure, working all over around the hairline, eyes, nose and mouth. Don't forget the neck.
STEP 3: Rinse well and pat dry.
STEP 4: Apply honey as a mask all over face and neck, making sure to apply thinly on forehead, so it doesn't drip into your eyes as you let it set. Leave on for 15 minutes. Rinse and pat dry before applying toner and moisturizer.
----------------------------------------------------------------------
Cucumber Mask:
Playing around with some new ingredients. I've found the best way to find new original recipes is to mix 'em, slap 'em on, and hope for the best! Here's my twist on an old favorite:
Cucumber Mask:
-1 Tbs kefir
-1 Tbs oatmeal. Get it as close to powder form as possible in a food processor, pestle, or roughly chopped for more exfoliation.
-1 whole cucumber
-2 tablespoons plain yogurt or sour cream
-1 teaspoon honey
Mix together the kefir and oats in a small bowl and set aside.
Peel cucumber and use a blender to liquefy.
Add honey and yogurt. Blend well.
Gently mix in kefir/oats to combine.
Apply to clean face and neck and relax with a book or soothing music for 15-20 minutes.
Rinse and finish up with toner and moisturizer.
-------------------------------------------------------------------------------
Spa Night: Peppermint Foot Scrub & Cucumber Water Review 6/03/2010Tonight's homemade spa recipe is for a Peppermint Foot Scrub! Click here to read some of the great things peppermint oil can do for your health. I love using essential oils and peppermint is one of my favorite in home spa treatments. Personally, peppermint oil has been wonderful applied at the temples and between the eyes to treat a migraine. That and a firm massage to the center of the hairline along the neck can make a migraine manageable. My SIL asked me for a spa treatment recipe and I thought I'd share it here since it's perfectly suited for the sweltering heat. Hobby Lobby carries all sorts of essential oils for about $6 each. Next time you're at the store, pick up the ingredients and enjoy a refreshing foot scrub that feels great on hot summer feet!
This recipe makes enough to fill eight 8 oz jars, so make ahead for yourself to enjoy all summer long, or give them out for a girl's day, hostess gift, or to your guests at your summer barbeque. One of the best things about this scrub is the peppermint oil makes it tingle :) Aaahhhh.....
Peppermint Foot Scrub2 lbs coarse salt (can use sea salt or epsom salts)
32 oz olive oil (or almond oil)
33-40 drops peppermint pure essential oil (depending on how strong you'd like it)
-In a large glass bowl, mix salt and oil
-Add peppermint oil. Mix until well incorporated.
-Transfer to jars with lids
-To be used only as a foot scrub.
-Indulge after a warm foot soak. Scrub, rinse, pat dry.
-Enjoy your fresh smelling, cooled off feet! -For dry skin, apply moisturizer after drying to keep your feet looking great.
Cucumber Water Review
I wrote last Spa Night, how I wanted to try Cucumber Water and when I went to the grocery store this week, I just had to grab a few cucumbers for the recipe. Here's a tutorial in photos and review:
Peel and chop up 1 whole cucumber. I sliced it into pieces that would fit into the jug I was using.
Add cucumber to regular water with lemon juice.I know in home therapy lemon juice in small quantities can be substituted for vinegar, so I didn't pick up lemons because I had vinegar. A few drops of white vinegar went into the mix. You just need the acidity to help the cucumber juice extraction along.
I used peppermint oil instead of fresh mint, mainly because there was none to be found when I went shopping.So, here's where I messed up. I know 2 to 3 drops of peppermint oil in an 8 oz glass of water will settle a gassy/upset stomach. So, I figured 10 drops to 3/4 gallons of water would be fine, right? Wrong!
Let your cucumber water sit covered in the fridge for 24 hours. After that, you can either remove the cucumber pieces or keep them in. I left mine. Serve in tall glasses garnished with a fresh slice of cucumber.
REVIEW: Whoa! Hubby avoids this stuff like poison after his initial taste. And once I tasted it, I understood. 10 drops of peppermint oil was way too much. It was like drinking vapor rub that cleared your sinuses and maybe singed a few taste buds. But, that isn't the recipe's fault. I apparently need to experiment some more to find the right balance. So, I'm still drinking the peppermint water as Hubby calls it, just watered down. A lot. I will put about half an inch of the cucumber water in a glass and fill it the rest of the way with plain water. Then it's drinkable and quite refreshing, but that doesn't stop Hubby from fondly calling me 'Pepomint breath' every time he kisses me. So, I guess, all in all, the recipe went well, and having it so concentrated will make it last a long time :). And hey, pepomint breath is better than halitosis any day.
Don't forget to make time for yourself this week. You'll be able to complete projects or take care of your family with a much happier heart. Happy pampering!-------------------------------------------------------------------------------------------------------------
Spa Night: Cucumber Water 5/27/2010
One of my favorite couponing blogs, Hip2Save, posted ideas for an at home Spa Day! Great minds, y'all. Head on over here to read the complete post and get some delicious sounding recipes to add to your Home Spa experience. I've included the one recipe from Hip2Save that I'm especially dying to try. I just need to pick up some cucumbers the next time I'm at the store. Then hello, relaxation!
Cucumber Water
In order for the cucumber to fully release its juice, you need to prepare it the day before your event.
1 cucumber, sliced and unpeeled + 6-7 cucumber slices for decoration
1 1/2 to 2 liters of water
3 mint sprigs + 2 mint sprigs for decoration
Half a lemon, sliced and unpeeled
Ice cubes
In a pitcher, mix the water, cucumber, 3 mint sprigs and lemon. Let it rest on the fridge for 24 hours. If you prepare the water at the last minute, cut the first cucumber in three or four pieces. Then, squeeze the cucumber pieces to release all the juice. Before serving remove the cucumber slices used to flavor the water. Then stir with a wooden spoon, add some ice cubes, 6 or 7 fresh cucumber slices and the remaining 2 mint sprigs.
If you haven't taken the time to consciously relax this week, what are you waiting for? Your peace of mind will thank you. Happy Pampering!
-------------------------------------------------------------------------------------------------------------
Spa Night: Acne Spot Treatment 5/20/2010
I'm so ready for spa night! Hubby and I worked so hard on Tuesday, cleaning our apartment from top to bottom and doing the huge pile of laundry. It was a long day, but so worth it because our new home is finally organized! Yesterday, I only had to do every day cleaning to maintain the place the way I like it. I had so much free time it was ridiculous. All the extra time got me thinking about tonight's spa treatment as well as starting on designing a more peaceful space in which to do spa treatments. But more on that later.
I am in need of a homemade spa treatment because I am breaking out like crazy. Tea tree oil applied with a qtip has been great for me, but I want to learn to make use of different ingredients I always have in the kitchen. I'm really interested in finding a leave on night treatment. A quick search brought up a popular homemade acne spot treatment that I had never heard about: Cinnamon, nutmeg and honey. This is such great news to me because it makes use of ingredients I almost always have in my cabinets.
I'm naming my version:
Holiday Spice Acne Spot Treatment
1/2 tsp ground cinnamon1/2 tsp ground nutmegHoney
-In a small container, mix well cinnamon and nutmeg
-Add and mix honey drop by drop, until a very thick paste is formed.
-Spot apply onto blemishes after cleansing and patting dry.
-Leave overnight and rinse off in the morning.
Here's a bonus recipe for you as well, which is rumored to heal blemishes quickly, leaving smooth skin with no scarring! We'll see if it works :)
Miracle Acne Spot Treatment
1/2 tsp ground nutmeg
Milk
-In a small container, add milk drop by drop to nutmeg, mixing to form a thick paste.
-Spot apply onto blemishes after cleansing and patting dry.
-Leave overnight and rinse off in the morning.
Neither of these treatments had specified measurements, but recommended only making enough for one or two uses. That way you would be sure to use fresh treatments to ensure great results. I've used honey in many homemade spa recipes, but after researching the benefits of the new ingredients, I've estimated the amounts needed.
Feel free to browse, use and share my collection of homemade spa recipes below. Don't forget to link back to my blog. I share a new Spa Night post every Thursday and will be adding each recipe to this page for easy access. Make time to pamper yourself this week! You won't regret it. Happy Pampering!
- Driftwood Girl
Disclaimer: All homemade beauty products and results are based on my own use and experience. The facts included about these cupboard products are only a few benefits/risks. Use responsibly. I cannot be held liable for any allergic or adverse reactions experienced while using recommended ingredients. No skin treatment presented on this website is intended to be used in place of a doctor or dermatologist's advice. For personal use or gifts only, not intended for sale.
------------------------------------------------------------------------------------------------
------------------------------------------------------------------------------------------------------------------------
----------------------------------------------------------------------
Cucumber Mask:
Playing around with some new ingredients. I've found the best way to find new original recipes is to mix 'em, slap 'em on, and hope for the best! Here's my twist on an old favorite:
-------------------------------------------------------------------------------
Spa Night: Peppermint Foot Scrub & Cucumber Water Review 6/03/2010
Spa Night: Homemade Conditioner for Hair Growth
My wonderful friend and sis Rachel @ Raznoggle.com sent me the link for thishomemade hair conditioner. I don't have all the ingredients, but will definitely be trying this when I do. Check your cabinets! You might be able to do this for your spa night, and if you do, please let me know how you liked it.
Homemade Conditioner - For hair growth
Things You'll Need:
1/4 cup of plain natural yogurt
1 egg yolk
1 tsp. fresh lemon juice
8 to 10 drops of eucalyptus oil
Directions:
Place the natural yogurt in a small bowl. Yogurt is not only the creamy base of your natural conditioner, but it is also a gentle cleansing agent that will help to clear pores. Yogurt has natural anti-fungal and anti-bacterial properties that will gently wash away the dirt and grime that inhibits hair growth.
Separate the egg white from the yolk and add the yolk to the yogurt. Egg yolk is a natural and deep-penetrating moisturizer that will not only make your hair silky smooth, but also help add elasticity and strength, so that as your hair grows it will break less.
Add 1 tsp. of fresh lemon juice to the mixture. Lemon is a natural astringent that will help to remove shampoo and product build-up. Lemon, the same pH as your hair's natural oil, can help protect and seal the hair's cuticle, preventing split ends.
Mix in 8 to 10 drops of eucalyptus oil and stir until creamy. Eucalyptus oil has a cool, refreshing effect on the skin and will help to stimulate blood circulation on the scalp, encouraging hair growth.
Wet your hair thoroughly and apply the conditioner. Massage the conditioner into your scalp gently for at least five minutes. For deep penetrating conditioning, you can wrap your head in a towel and allow the treatment to set for 20 to 30 minutes. When ready, rinse your hair and towel dry.
Click here to be taken to the original eHow article.
Have you taken some time to relax this week? I admit I really need to get my spa night in, it's been a long week!
Psst... thanks, Rachel for the recipe! I can't wait to try it.
Happy pampering!---------------------------------
Spa Night: Easy Homemade Sugar Scrub
My easy recipe for a sugar scrub.
1 cup salt or 1 cup granulated sugar
2 Tbs olive oil or liquid coconut oil
2 tsp honey
3-5 drops of essential oil of your choice (optional for added benefit)
-Mix all ingredients well to evenly distribute the honey and oil.
Think of the lucky dates he will wow with his fabulous spa gifts ;)
Aahhhh.... I love the smell of brown sugar.
-Transfer to tightly lidded container of your choice.
That's it! Look at you, you fabulous homemade beauty! Can you believe you used to pay for this??
Hey, with a name like Smucker's it has to be good, right?
Come back tomorrow for a post on how to get those annoying labels off your recycled jam jar. The easy way!
-For a thinner scrub, add more liquid ingredients a bit at a time until it reaches the desired consistency.
Great on rough spots (knees, elbows and feet) and safe for facial exfoliation too!
NOTE: As with any scrub, be very gentle on sensitive areas around the eyes and nose.
FUN FACTS:
-I added the honey to work as a natural preservative and skin softener and it works amazingly well. This scrub will keep for months and travels well if you want to ship a batch as a gift.
-Salt is great as a scrub, but I prefer sugar because it's not as drying to my skin.
-Olive and coconut oils have been used for centuries as a natural conditioner for both skin and hair. Knowing how to use oils in your beauty treatments can give you a beautiful healthy glow! Click here to read about a way to use these oils instead of chemical laden face washes. That's right, oil to cleanse your face!
This is a basic scrub and you can build on it any way you wish.
As you get more comfortable making it, you can add food coloring to a scrub made with white sugar for a fun presentation. For a little more luxury, add dried herbs and a drop or two of fragrance and essential oils.
Be careful with fragrance and essential oils in a face scrub. A tiny bit is enough! Too much can cause break outs. Fragrance oils are delicious in body scrubs, though and the right scent can enhance the spa experience.
Who says you have to pay a lot for that luxurious body scrub at the store? Make your own for pennies and enjoy creating your very own homemade spa! Hey, you don't even have to drive there!
Have you taken time out for yourself this week? I guarantee, you won't regret it.
Happy pampering, Beauties!
PS
Many of you amazing people already know how to make sugar scrub. What are your favorite ingredients?
Spa Night: Homemade Conditioner for Hair Growth

My wonderful friend and sis Rachel @ Raznoggle.com sent me the link for thishomemade hair conditioner. I don't have all the ingredients, but will definitely be trying this when I do. Check your cabinets! You might be able to do this for your spa night, and if you do, please let me know how you liked it.
Homemade Conditioner - For hair growth
Things You'll Need:
1/4 cup of plain natural yogurt
1 egg yolk
1 tsp. fresh lemon juice
8 to 10 drops of eucalyptus oil
Directions:
Place the natural yogurt in a small bowl. Yogurt is not only the creamy base of your natural conditioner, but it is also a gentle cleansing agent that will help to clear pores. Yogurt has natural anti-fungal and anti-bacterial properties that will gently wash away the dirt and grime that inhibits hair growth.
Separate the egg white from the yolk and add the yolk to the yogurt. Egg yolk is a natural and deep-penetrating moisturizer that will not only make your hair silky smooth, but also help add elasticity and strength, so that as your hair grows it will break less.
Add 1 tsp. of fresh lemon juice to the mixture. Lemon is a natural astringent that will help to remove shampoo and product build-up. Lemon, the same pH as your hair's natural oil, can help protect and seal the hair's cuticle, preventing split ends.
Mix in 8 to 10 drops of eucalyptus oil and stir until creamy. Eucalyptus oil has a cool, refreshing effect on the skin and will help to stimulate blood circulation on the scalp, encouraging hair growth.
Wet your hair thoroughly and apply the conditioner. Massage the conditioner into your scalp gently for at least five minutes. For deep penetrating conditioning, you can wrap your head in a towel and allow the treatment to set for 20 to 30 minutes. When ready, rinse your hair and towel dry.
Click here to be taken to the original eHow article.
Have you taken some time to relax this week? I admit I really need to get my spa night in, it's been a long week!
Psst... thanks, Rachel for the recipe! I can't wait to try it.
Happy pampering!
1 cup salt or 1 cup granulated sugar
2 Tbs olive oil or liquid coconut oil
2 tsp honey
3-5 drops of essential oil of your choice (optional for added benefit)
-Mix all ingredients well to evenly distribute the honey and oil.
 |
| Think of the lucky dates he will wow with his fabulous spa gifts ;) |
 |
| Aahhhh.... I love the smell of brown sugar. |
-Transfer to tightly lidded container of your choice.
That's it! Look at you, you fabulous homemade beauty! Can you believe you used to pay for this??
 |
| Hey, with a name like Smucker's it has to be good, right? Come back tomorrow for a post on how to get those annoying labels off your recycled jam jar. The easy way! |
-For a thinner scrub, add more liquid ingredients a bit at a time until it reaches the desired consistency.
Great on rough spots (knees, elbows and feet) and safe for facial exfoliation too!
NOTE: As with any scrub, be very gentle on sensitive areas around the eyes and nose.
FUN FACTS:
-I added the honey to work as a natural preservative and skin softener and it works amazingly well. This scrub will keep for months and travels well if you want to ship a batch as a gift.
-Salt is great as a scrub, but I prefer sugar because it's not as drying to my skin.
-Olive and coconut oils have been used for centuries as a natural conditioner for both skin and hair. Knowing how to use oils in your beauty treatments can give you a beautiful healthy glow! Click here to read about a way to use these oils instead of chemical laden face washes. That's right, oil to cleanse your face!
This is a basic scrub and you can build on it any way you wish.
As you get more comfortable making it, you can add food coloring to a scrub made with white sugar for a fun presentation. For a little more luxury, add dried herbs and a drop or two of fragrance and essential oils.
Be careful with fragrance and essential oils in a face scrub. A tiny bit is enough! Too much can cause break outs. Fragrance oils are delicious in body scrubs, though and the right scent can enhance the spa experience.
Who says you have to pay a lot for that luxurious body scrub at the store? Make your own for pennies and enjoy creating your very own homemade spa! Hey, you don't even have to drive there!
Have you taken time out for yourself this week? I guarantee, you won't regret it.
Happy pampering, Beauties!
PS
Many of you amazing people already know how to make sugar scrub. What are your favorite ingredients?
----------------------------------------
Spa Night: Rice Water Toner with a Cheapskate Twist! 8/05/2010
I wanted to share this amazingly simple but exponentially brilliant tip sent to me by Barbie @ Adventures of a Wannabe Cheapskate. Remember how much I love Rice Water Toner? You'll also remember how it usually keeps only for a few days so I added tea tree oil to mine, which enabled usage for up to two and a half weeks with no problems. Alright, there's one problem. Tea tree oil is expensive! Well, Barbie came up with a different (and cheaper!) way to make her Rice Water Toner last. In the freezer! No kidding. Awesome, right? Since learning this tip, I am able to save my tea tree oil for other projects and can still enjoy the benefits of rice water! Here it is, in her own words:
I wanted to tell you how much I love the rice water toner.... I tried it, and really like it. I ran out and didn't make any for a while, and I can really tell the difference. I made it a priority recently to make some more. I don't have tea tree oil... When I made it most recently, I poured it into an ice cube tray and froze it. When it was completely frozen, I emptied the tray into a ziploc and stored that in the freezer. I take one ice cube out and put it in a cup in the fridge to melt overnight. I find that the ice cube size is just right for a morning and evening use. So, that's my own cheapskate twist on rice water toner. I love it! And I love that super cold feeling of fresh-from-the-fridge toner. Everybody should keep their toner (no matter what kind they use) in the freezer!
I totally agree, Barbie! I always kept my Healing Toner in the fridge. Even when I used plain witch hazel, it was stored in the fridge for that fresh, cool feeling. I love Barbie's tip because it's so practical, which is what beauty treatments need to be when you're busy enjoying life. So, thanks for the great tip! It has made having my rice water even more frugal and it lasts a whole lot longer.
Using the rice water ice cubes has been a huge time saver for me! I love to swipe the ice cube over my clean skin in the morning for a refreshing wake up call that's good for my skin too. Using it this way in also helps to reduce my morning companion: puffy eyes. I use half of it in the morning and toss the rest of the ice cube into a ziptop snack bag back in the freezer.
In the evening, to finish off my Oil Cleansing Method, I swipe the rest of the ice cube over my face and neck until it's gone. Aaahhh.... very relaxing.
Do you love homemade skincare? If something doesn't work at first, tweak it! You might find a fabulous new way that works for your unique skin situation. Or maybe, like Barbie, you'll find an all around better way of doing things. That's what is so wonderful about making your own products. You can adjust ingredients, preparation, and consistency to suit you. And that, my friend is a beautiful thing!
I wanted to tell you how much I love the rice water toner.... I tried it, and really like it. I ran out and didn't make any for a while, and I can really tell the difference. I made it a priority recently to make some more. I don't have tea tree oil... When I made it most recently, I poured it into an ice cube tray and froze it. When it was completely frozen, I emptied the tray into a ziploc and stored that in the freezer. I take one ice cube out and put it in a cup in the fridge to melt overnight. I find that the ice cube size is just right for a morning and evening use. So, that's my own cheapskate twist on rice water toner. I love it! And I love that super cold feeling of fresh-from-the-fridge toner. Everybody should keep their toner (no matter what kind they use) in the freezer!
I totally agree, Barbie! I always kept my Healing Toner in the fridge. Even when I used plain witch hazel, it was stored in the fridge for that fresh, cool feeling. I love Barbie's tip because it's so practical, which is what beauty treatments need to be when you're busy enjoying life. So, thanks for the great tip! It has made having my rice water even more frugal and it lasts a whole lot longer.

Using the rice water ice cubes has been a huge time saver for me! I love to swipe the ice cube over my clean skin in the morning for a refreshing wake up call that's good for my skin too. Using it this way in also helps to reduce my morning companion: puffy eyes. I use half of it in the morning and toss the rest of the ice cube into a ziptop snack bag back in the freezer.

Do you love homemade skincare? If something doesn't work at first, tweak it! You might find a fabulous new way that works for your unique skin situation. Or maybe, like Barbie, you'll find an all around better way of doing things. That's what is so wonderful about making your own products. You can adjust ingredients, preparation, and consistency to suit you. And that, my friend is a beautiful thing!
----------------------------------------
Spa Night: Oil for Facial Cleansing 7/29/2010
Using oil instead of soap to cleanse your face? This website is filled with extensive information on this ancient but now almost unheard of method for clear, beautiful skin! I found that reading what people who have actually used it are saying has been helpful too. The idea that something so simple could be so much better than all the technologically advanced cleansers we have now is definitely enough to pique my interest.
Here are some of the questions I initially had and the answers I've found:
How is the cleansing done?~A quarter sized amount of natural oil is massaged vigorously onto face for at least 5 minutes. This motion loosens the hardened material in enlarged pores and with continued use will remove them completely.
~Makeup doesn't even need to be removed before doing this, the oil will remove it, even mascara.
~Once the massage is over, gently wipe the oil off with a hot steamy washcloth, rinsing the towel and wiping until all oil is removed. This is important. Remove all of the oil, even if you didn't wear makeup. The oil on your face is now dirty and leaving it on your face might cause more problems. That's it. No need to rinse. Toner and a bit of clean oil as moisturizer and you're ready for bed.
~In the morning, use a clean washcloth to gently wash your face with water only.
How often is this done in order to see results?~Once a day before bedtime.
Why oil?~The whole premise is that commercial facial cleansers strip skin of it's natural oils. In response, skin overcompensates by producing too much oil which clogs and enlarges pores.
~The oil used is pure and natural and extremely good for skin care. Castor oil, extra virgin olive oil, virgin coconut oil, etc.
~Oil gently cleanses the pores by loosening built up dirt and oil clogging the pores. Removing these blemishes without stripping moisture from the face is key! Facial skin is left invigorated (from the massage) and gently deep cleaned.
Does it work?Many people have seen significant improvement in their skin with the Oil Cleansing Method (OCM) including: Disappearance of blemishesEven skin toneUnbelievably soft skinDisappearance of blackheads/whiteheadsReduced dark circles under eyesPlumper, younger looking skin
What type of skin has it worked for?Combination skinNormal skinOily skinAcne prone skinDiagnosed rosaceaSufferers of psoriasis
So what are your thoughts? Would you try it?
Yesterday was my second day on OCM (using virgin coconut oil. Thanks to my awesome Mom!) and I'm excited to already see results. My pores are shrinking and unclogging, the whole kaboodle. I have combination skin. Very oily in the Tzone with very dry patches scattered everywhere else. As my skin is adjusting to not being dried out or overproducing oil, I'm happy to see my Tzone isn't so oily and there are definitely no more scaly dry patches! After two days! So, needless to say, I'm sticking with it and hoping for much better long term results.

Using oil instead of soap to cleanse your face? This website is filled with extensive information on this ancient but now almost unheard of method for clear, beautiful skin! I found that reading what people who have actually used it are saying has been helpful too. The idea that something so simple could be so much better than all the technologically advanced cleansers we have now is definitely enough to pique my interest.
Here are some of the questions I initially had and the answers I've found:
How is the cleansing done?
~A quarter sized amount of natural oil is massaged vigorously onto face for at least 5 minutes. This motion loosens the hardened material in enlarged pores and with continued use will remove them completely.
~Makeup doesn't even need to be removed before doing this, the oil will remove it, even mascara.
~Once the massage is over, gently wipe the oil off with a hot steamy washcloth, rinsing the towel and wiping until all oil is removed. This is important. Remove all of the oil, even if you didn't wear makeup. The oil on your face is now dirty and leaving it on your face might cause more problems.
That's it. No need to rinse. Toner and a bit of clean oil as moisturizer and you're ready for bed.
~In the morning, use a clean washcloth to gently wash your face with water only.
How often is this done in order to see results?
~Once a day before bedtime.
Why oil?
~The whole premise is that commercial facial cleansers strip skin of it's natural oils. In response, skin overcompensates by producing too much oil which clogs and enlarges pores.
~The oil used is pure and natural and extremely good for skin care. Castor oil, extra virgin olive oil, virgin coconut oil, etc.
~Oil gently cleanses the pores by loosening built up dirt and oil clogging the pores. Removing these blemishes without stripping moisture from the face is key! Facial skin is left invigorated (from the massage) and gently deep cleaned.
Does it work?
Many people have seen significant improvement in their skin with the Oil Cleansing Method (OCM) including:
Disappearance of blemishes
Even skin tone
Unbelievably soft skin
Disappearance of blackheads/whiteheads
Reduced dark circles under eyes
Plumper, younger looking skin
What type of skin has it worked for?
Combination skin
Normal skin
Oily skin
Acne prone skin
Diagnosed rosacea
Sufferers of psoriasis
So what are your thoughts? Would you try it?
Yesterday was my second day on OCM (using virgin coconut oil. Thanks to my awesome Mom!) and I'm excited to already see results. My pores are shrinking and unclogging, the whole kaboodle. I have combination skin. Very oily in the Tzone with very dry patches scattered everywhere else. As my skin is adjusting to not being dried out or overproducing oil, I'm happy to see my Tzone isn't so oily and there are definitely no more scaly dry patches! After two days! So, needless to say, I'm sticking with it and hoping for much better long term results.
-----------------------------------------
Spa Night: Give Up Shampoo?? 7/22/2010
Alright, here's a topic that is potentially cringe worthy but I think is worth a try: Give up shampoo and conditioner in favor of a more frugal hair cleansing regimen.
Could you do it? Could you go without shampoo and conditioner? You know what? I'm up for it.
You can read up on the pros and cons of going without oil stripping commercial shampoo in the same post I stumbled on by Alison @ Wholesome Goodness.
I've already been using my Vinegar Shine Rinse in place of dandruff shampoo and have loved the disappearance of flakes! So, I think this is the next step to healthy hair. Basically, here's what I'll be using:
In place of shampoo- Baking soda and water
In place of conditioner- Apple cider vinegar and water
Here are the basics that have me intrigued:
-Commercial shampoos are too harsh and strip the hair of natural oils.
-After a (very) greasy transition period that could last 2 weeks to 2 months, your hair will find it's natural balance and look it's best.
-Baking soda is a gentle cleanser that's good for the earth, your hair and your wallet!
-Vinegar will restore the PH balance in your hair, stimulate the smaller capillaries in the scalp and lock in shine.
Here's marking day 1! No shampoo or conditioner starting today. I hope I can stand it long enough to get through the greasy adjustment period.
Here's how my hair looks today after using baking soda and vinegar for the first time yesterday:
So far, no signs of overt greasiness. I can't believe the shine! It doesn't even shine like that after a homemade Hot Oil Treatment!
Looking forward to seeing how this all works out. I"m excited that this frugal solution might actually be better for my hair. So, would you try it?
Could you do it? Could you go without shampoo and conditioner? You know what? I'm up for it.
You can read up on the pros and cons of going without oil stripping commercial shampoo in the same post I stumbled on by Alison @ Wholesome Goodness.
I've already been using my Vinegar Shine Rinse in place of dandruff shampoo and have loved the disappearance of flakes! So, I think this is the next step to healthy hair. Basically, here's what I'll be using:
In place of shampoo- Baking soda and water

In place of conditioner- Apple cider vinegar and water

Here are the basics that have me intrigued:
-Commercial shampoos are too harsh and strip the hair of natural oils.
-After a (very) greasy transition period that could last 2 weeks to 2 months, your hair will find it's natural balance and look it's best.
-Baking soda is a gentle cleanser that's good for the earth, your hair and your wallet!
-Vinegar will restore the PH balance in your hair, stimulate the smaller capillaries in the scalp and lock in shine.
Here's marking day 1! No shampoo or conditioner starting today. I hope I can stand it long enough to get through the greasy adjustment period.
Here's how my hair looks today after using baking soda and vinegar for the first time yesterday:

So far, no signs of overt greasiness. I can't believe the shine! It doesn't even shine like that after a homemade Hot Oil Treatment!
Looking forward to seeing how this all works out. I"m excited that this frugal solution might actually be better for my hair. So, would you try it?
--------------------------------------
Spa Night: Brightening Mask
Here I am with my mom, who was such an amazing good sport during her recent visit. She got a crash course in homemade relaxation! It was tons of fun and we got amazing results. I've used the mask pictured here before, but never posted the recipe, so here it is, a homemade brightening mask.

Brightening Mask
-1/4 cup plain yogurt (ooh, homemade yogurt comes in handy!)
-2 Tbs honey
-1/2 tsp turmeric
-flour
STEP 1: In a small bowl, combine yogurt, honey and turmeric until well combined.
STEP 2: Add a teaspoon of flour at a time, stirring after each, to form a thick spreadable paste. Think facial masks you buy in the store and go for that consistency, like thick mayonnaise.
STEP 3: Apply evenly over freshly washed face, massaging into skin. Let dry for 10-15 minutes as flour tightens the mask.
STEP 4: When dry, remove the mask by scrubbing with a warm, moist washcloth. This is an extra polishing step, removing dead skin cells. Rinse well and apply your favorite toner and a gentle moisturizer.
Enjoy your brightened, smooth as silk skin!
FUN FACTS:
-The use of turmeric in facial masks has shown improvement in psoriasis and inflammatory skin conditions, evening out skin tone and promoting healing of open blemishes. Awesome, right? And there are a whole world of amazing things it does for your body when used regularly in cooking.
-Honey is one of my favorite at home antibacterials and skin softening agents!
-Yogurt is full of healthy bacteria and is another gentle softener.
-Use this mask once a week for gradual, brightening results.
Don't forget to take time for yourself this week! Here's hoping you're able to grab a relaxing moment. Happy pampering!
------------------------------------------------------------------------------------------------------------------------
Early Spa Night Post: Healing Liniment Recipe

I played around with the ingredients in the Healing Toner, increasing the measurements to create a healing liniment for my dad.
The liniment worked really well in conjunction with my very first Healing Salve. I'd never made anything like that before and was so excited with how it turned out! Here's a peek at the salve made of:
Beeswax, olive oil, vitamin E, tea tree oil, lavender essential oil, calendula and chamomile. Woohoo! Yes, seriously, those are all the ingredients. No chemicals! It was ultra healing and chock full of natural goodness. It smelled lovely, very natural and herbish and worked amazingly well. I love it so much that I'm going to make it regularly to use as diaper rash cream for Baby Boy. Anyway, not to get off topic, but I hope to post a recipe for the salve soon!

Here's the Healing Liniment recipe if anyone wants to give it a try.
Enjoy!
Healing Liniment
-Freshly brewed green tea
-Witch hazel
-Tea tree oil
-Water
Just remember, 3-2-1.
In a container of your choice, add 3 parts cooled green tea, 2 parts witch hazel and 1 part water.
Add 1/2 tsp tea tree oil and shake well to combine
Store in an air tight container in the fridge for up to 2 weeks.
Remember to shake well before each use to redistribute the tea tree oil, which will float on top after sitting.
Apply to freshly cleansed skin to heal, cool and soothe sore muscles or open wounds.
Easy, right? Here are some FUN FACTS:
Tea tree oil- Natural antibacterial, and a gently powerful healing and cleansing oil.
Witch hazel- Successfully used as pain relieving topical treatment for bruises, insect bites, sunburn, minor burns, poison ivy, hemorrhoids, varicose veins, stiff muscles and blemishes. Wow! Don't you just love this stuff?
NOTE: Guys, witch hazel is a fantastic natural aftershave. Ladies, on it's own it's an amazing toner you can use before makeup application or after makeup removal.
Puffy eyes? Soak cotton pads in witch hazel and rest them on your closed eye lids for 10-15 minutes for a quick refresher.
Green tea- Believed to have both healing and anti-aging properties.
Let this serve as an early reminder to make time to relax this week! Happy future pampering!
----------------------------------------------------------------------------------------------
Sweet Little Facial:
-Honey
-Favorite facial cleanser. I love this homemade castile soap bar I brought home from our South Pacific vacation last Christmas.
-A teaspoon of granulated sugar.
STEP 1: Lather Up! Using warm water to open up pores, lather up face and neck with cleanser.
STEP 2: Exfoliate. Pour sugar into your hand and massage into face, using the suds to distribute it evenly. Apply light, even pressure, working all over around the hairline, eyes, nose and mouth. Don't forget the neck.
STEP 3: Rinse well and pat dry.
STEP 4: Apply honey as a mask all over face and neck, making sure to apply thinly on forehead, so it doesn't drip into your eyes as you let it set. Leave on for 15 minutes. Rinse and pat dry before applying toner and moisturizer.
----------------------------------------------------------------------
Cucumber Mask:
Playing around with some new ingredients. I've found the best way to find new original recipes is to mix 'em, slap 'em on, and hope for the best! Here's my twist on an old favorite:

Cucumber Mask:
-1 Tbs kefir
-1 Tbs oatmeal. Get it as close to powder form as possible in a food processor, pestle, or roughly chopped for more exfoliation.
-1 whole cucumber
-2 tablespoons plain yogurt or sour cream
-1 teaspoon honey
Mix together the kefir and oats in a small bowl and set aside.
Peel cucumber and use a blender to liquefy.
Add honey and yogurt. Blend well.
Gently mix in kefir/oats to combine.
Apply to clean face and neck and relax with a book or soothing music for 15-20 minutes.
Rinse and finish up with toner and moisturizer.
-------------------------------------------------------------------------------
Spa Night: Peppermint Foot Scrub & Cucumber Water Review 6/03/2010
Tonight's homemade spa recipe is for a Peppermint Foot Scrub! Click here to read some of the great things peppermint oil can do for your health. I love using essential oils and peppermint is one of my favorite in home spa treatments. Personally, peppermint oil has been wonderful applied at the temples and between the eyes to treat a migraine. That and a firm massage to the center of the hairline along the neck can make a migraine manageable. My SIL asked me for a spa treatment recipe and I thought I'd share it here since it's perfectly suited for the sweltering heat. Hobby Lobby carries all sorts of essential oils for about $6 each. Next time you're at the store, pick up the ingredients and enjoy a refreshing foot scrub that feels great on hot summer feet!
This recipe makes enough to fill eight 8 oz jars, so make ahead for yourself to enjoy all summer long, or give them out for a girl's day, hostess gift, or to your guests at your summer barbeque. One of the best things about this scrub is the peppermint oil makes it tingle :) Aaahhhh.....
Peppermint Foot Scrub
2 lbs coarse salt (can use sea salt or epsom salts)
32 oz olive oil (or almond oil)
33-40 drops peppermint pure essential oil (depending on how strong you'd like it)
-In a large glass bowl, mix salt and oil
-Add peppermint oil. Mix until well incorporated.
-Transfer to jars with lids
-To be used only as a foot scrub.
-Indulge after a warm foot soak. Scrub, rinse, pat dry.
-Enjoy your fresh smelling, cooled off feet!
-For dry skin, apply moisturizer after drying to keep your feet looking great.
Cucumber Water Review
I wrote last Spa Night, how I wanted to try Cucumber Water and when I went to the grocery store this week, I just had to grab a few cucumbers for the recipe. Here's a tutorial in photos and review:
Peel and chop up 1 whole cucumber. I sliced it into pieces that would fit into the jug I was using.
Add cucumber to regular water with lemon juice.I know in home therapy lemon juice in small quantities can be substituted for vinegar, so I didn't pick up lemons because I had vinegar. A few drops of white vinegar went into the mix. You just need the acidity to help the cucumber juice extraction along.
I used peppermint oil instead of fresh mint, mainly because there was none to be found when I went shopping.So, here's where I messed up. I know 2 to 3 drops of peppermint oil in an 8 oz glass of water will settle a gassy/upset stomach. So, I figured 10 drops to 3/4 gallons of water would be fine, right? Wrong!
Let your cucumber water sit covered in the fridge for 24 hours. After that, you can either remove the cucumber pieces or keep them in. I left mine. Serve in tall glasses garnished with a fresh slice of cucumber.
REVIEW: Whoa! Hubby avoids this stuff like poison after his initial taste. And once I tasted it, I understood. 10 drops of peppermint oil was way too much. It was like drinking vapor rub that cleared your sinuses and maybe singed a few taste buds. But, that isn't the recipe's fault. I apparently need to experiment some more to find the right balance. So, I'm still drinking the peppermint water as Hubby calls it, just watered down. A lot. I will put about half an inch of the cucumber water in a glass and fill it the rest of the way with plain water. Then it's drinkable and quite refreshing, but that doesn't stop Hubby from fondly calling me 'Pepomint breath' every time he kisses me. So, I guess, all in all, the recipe went well, and having it so concentrated will make it last a long time :). And hey, pepomint breath is better than halitosis any day.
Don't forget to make time for yourself this week. You'll be able to complete projects or take care of your family with a much happier heart. Happy pampering!-------------------------------------------------------------------------------------------------------------


Spa Night: Cucumber Water 5/27/2010
One of my favorite couponing blogs, Hip2Save, posted ideas for an at home Spa Day! Great minds, y'all. Head on over here to read the complete post and get some delicious sounding recipes to add to your Home Spa experience. I've included the one recipe from Hip2Save that I'm especially dying to try. I just need to pick up some cucumbers the next time I'm at the store. Then hello, relaxation!
If you haven't taken the time to consciously relax this week, what are you waiting for? Your peace of mind will thank you. Happy Pampering!
Cucumber Water

In order for the cucumber to fully release its juice, you need to prepare it the day before your event.
1 cucumber, sliced and unpeeled + 6-7 cucumber slices for decoration
1 1/2 to 2 liters of water
3 mint sprigs + 2 mint sprigs for decoration
Half a lemon, sliced and unpeeled
Ice cubes
In a pitcher, mix the water, cucumber, 3 mint sprigs and lemon. Let it rest on the fridge for 24 hours. If you prepare the water at the last minute, cut the first cucumber in three or four pieces. Then, squeeze the cucumber pieces to release all the juice. Before serving remove the cucumber slices used to flavor the water. Then stir with a wooden spoon, add some ice cubes, 6 or 7 fresh cucumber slices and the remaining 2 mint sprigs.
If you haven't taken the time to consciously relax this week, what are you waiting for? Your peace of mind will thank you. Happy Pampering!
I am in need of a homemade spa treatment because I am breaking out like crazy. Tea tree oil applied with a qtip has been great for me, but I want to learn to make use of different ingredients I always have in the kitchen. I'm really interested in finding a leave on night treatment. A quick search brought up a popular homemade acne spot treatment that I had never heard about: Cinnamon, nutmeg and honey. This is such great news to me because it makes use of ingredients I almost always have in my cabinets.
I'm naming my version:
Holiday Spice Acne Spot Treatment

1/2 tsp ground cinnamon
1/2 tsp ground nutmeg
Honey
-In a small container, mix well cinnamon and nutmeg
-Add and mix honey drop by drop, until a very thick paste is formed.
-Spot apply onto blemishes after cleansing and patting dry.
-Leave overnight and rinse off in the morning.
Here's a bonus recipe for you as well, which is rumored to heal blemishes quickly, leaving smooth skin with no scarring! We'll see if it works :)
Miracle Acne Spot Treatment

1/2 tsp ground nutmeg
Milk
-In a small container, add milk drop by drop to nutmeg, mixing to form a thick paste.
-Spot apply onto blemishes after cleansing and patting dry.
-Leave overnight and rinse off in the morning.
Neither of these treatments had specified measurements, but recommended only making enough for one or two uses. That way you would be sure to use fresh treatments to ensure great results. I've used honey in many homemade spa recipes, but after researching the benefits of the new ingredients, I've estimated the amounts needed.
-------------------------------------------------------------------------------------------------------------
Spa Night: Chamomile Steam 5/13/2010
Aaahhhh....Thursday. I've missed you so. Right now, while Baby Boy's down for a nap, I've done a Chamomile Steam followed by a Quenching Mask. If you want to try it yourself, just follow these steps to relaxation:
Have the mask you will use following the facial steam ready before hand.
Chamomile Steam:
Hot water
Chamomile tea bag
Tea tree oil
Medium bowl
Bath towel
Some sort of timer. I just use the one on my microwave or stove.
-Use a headband or tie hair in a pony tail to keep it out of your face.
-Boil enough water to fill your bowl.
-Place tea bag in the bowl, pour boiled water and let steep 2 minutes.
-Add 2 to 3 drops tea tree oil to water. Do not remove tea bag.

-Place bowl on a table at a comfortable height that will allow you to lean over the bowl, using your forearms for support.
-Put on some soothing music or (if your little one is sleeping) relish in the beautiful phenomenon of silence.
-Set a timer for 10 minutes.
-Position your face over the bowl of water and drape the towel over your head to form a mini sauna.
-Breathe in the soothing steam and relax as your pores open up.
-When timer goes off, apply Quenching Mask to still warm skin for maximum results.
-Rinse, tone and moisturize and you're done! Enjoy your deeply conditioned skin.
FUN FACTS:
-Steaming opens up pores, leaving them ready to receive all the goodness you want to slather on as beauty treatments. You can steam to maximize the results of a scrub, mask, toner, etc.
-Add your favorite essential oil or herbal tea for a pleasant steaming experience. You can use plain water, but it feels so much more luxurious (and relaxing) when you're breathing in a soothing fragrance.
-Steaming regularly can loosen dried oils and black heads that clog pores, making your after steaming treatment that much more effective.
-DO NOT forget to apply moisturizer after steaming.
I really need to do this because of the lack of moisture in the air. This island girl needs humidity! Along with my pollen allergies, my skin is left unbelievably dry and uncomfortable, even with regular toning and moisturizing. I'll be so glad once I figure out exactly what I need for my skin in this slightly dryer, cooler climate.
Three steps to happy skin:
Step 1: Remove dead cells and make room for new growth
Unveil your sweet new skin: If you don't want to make a huge batch of sugar scrub, you can still get the benefits of using this natural exfoliator in your daily skin cleansing and save the majority of kitchen sugar for your coffee!
Lather up your face with your favorite cleanser, then take a small handful of granulated sugar (just a few tablespoons will do) and massage the granules all over your skin for about 30 seconds. Be extra gentle around the sensitive nose and eye area. Rinse off the soap and sugar to reveal smoother, baby soft skin. I use this every day and love it as an alternative to buying expensive scrubs.
Step 2: Nourish your skin with a moisturizing mask. Now that the older dull skin has been sloughed off, let's pamper the new cells and set them up to be moisturized and glowing! I've got three of my favorite masks for you to choose from.
Quenching Mask for smooth, moisturized skin1/2 small avocado
1/4 cup Honey
-Peel and mash avocado and add honey until you have a thick paste.
-Apply to clean skin and leave on for 15 minutes
-Rinse with cool water.
Skin should feel beautifully soft and quenched!
*This is the mask I"ll be doing tonight. Yay!
Soothing Moisture Mask to heal, soothe and hydrate1 Tbs plain yogurt (w/ live enzymes is best. Hey! a reason to make Crockpot Yogurt! Haha)
Honey
1 Tbs oatmeal
The finer you can get the oatmeal the better. I've used a blender before to blend half a cup of oatmeal almost to a powder, then set aside the remainder in a zip top bag for future spa treatments.
-Warm a spoon by placing in a mug of hot water for 2 minutes.
-Add 4 to 5 drops of honey to the spoon, so honey will be well warmed.
-In a small bowl, mix yogurt and oatmeal with your honeyed spoon until all ingredients are well blended.
-Apply to clean face and neck, massaging with fingertips to stimulate circulation.
-Relax for 15 minutes as your mask sets. Rinse with warm water and apply moisturizer.
Enjoy your silky smooth, freshly nourished skin!
*This yogurt honey mask is a favorite of mine. My skin feels so silky afterward!*
Deep Conditioning Mask for skin that needs moisture - quick!
1/2 Avocado.
Extra Virgin Olive Oil
-Peel and mash avocado.
-In small bowl, mix in olive oil 1 Tbs at a time until you have a smooth, spreadable paste.
-Apply to clean face and neck. Let it soak into thirsty skin for 10-15 minutes.
-Remove with warm water and revel in your kissably soft, newly conditioned skin :)
*I've used this in the winter for quick hydration. It works wonders!


Step 3: Apply toner and/or moisturizer and enjoy. You're done! It will be hard not to keep touching your baby soft skin :)
Soothing Toner

The best toner for dry or sensitive skin is the simplest. Green tea! Brew a cup and keep it in the fridge. Apply onto freshly cleansed skin before you moisturize. Replace every 3 to 4 days with a fresh batch.
Witch hazel is also a great gentle toner, but is a little more drying than green tea.
FUN FACTS:
Honey is a naturally gentle cleanser that will aid in healing and leave your skin soft and smooth.
Yogurt, another natural antibacterial, soothes and softens, locking in moisture.
Oatmeal will soothe irritated or dry skin that is developing sensitivity.
Avocado and Extra Virgin Olive Oil are amazing deep conditioners. Use on hair and skin for great results!
Green tea is a wonderful antioxidant that can also soothe dry skin. It's rumored to have anti-aging qualities as well.
SWEET TIP: If dry skin is extremely sensitive and becomes irritated when wearing homemade masks, apply a thin layer of warm honey to skin and then apply the mask on top of that. The honey will act as a breathable filter for your skin, softening and cleansing while allowing the mask ingredients to seep through and work through the protection of the honey 'shield'.
Ready for some pampering? I am! Tonight I'm doing another Olive Oil Deep Conditioning Treatment, a pedicure and an Egg White Toning Mask.
Here's my recipe for an Egg White Toning Mask so you can try it yourself. This is great to perk your skin up for an event, date, or family photos. Use a few hours before your event for glowing, firmer skin with or without makeup. For regular skin care, may be used once a week. When pressed for time, I use the egg whites lightly beaten, not thick enough to form peaks. The benefit of whipping it, though, is that the chances of egg white dripping down your neck as it dries is greatly reduced. Bottom line: whipped or lightly beaten, the end result is the same. Tightened pores and smoother skin.
FUN FACTS
-Over time, this mask can help your pores appear less visible.
-Add 1 tbsp of honey before whipping to create a mask that can heal as well as tighten.
-Honey is a natural antibacterial, helping any open blemishes to heal and with continued use, is great for unclogging pores.
Now, obviously, taking care of a very active little boy and the normal routine of running a household doesn't always add up to uninterrupted blocks of time for spa treatments. Because I'm generally in a better mood the rest of the week when I take time for myself, I use what I have. And that usually means breaking up the time I use into realistic increments. For instance, today, when Baby Boy went down for a nap, I did the Hot Oil Treatment and Egg White Mask. I have other things to get done for the remainder of naptime so, I'll leave the pedicure for later on tonight when Little Man's down for the night. That way neither Baby Boy, the house, or I suffer :) Anyway, just thought I'd throw that out there to encourage you to make time for yourself because the relaxation is worth the effort. Happy Spa Night!
Here's my recipe for an Egg White Toning Mask so you can try it yourself. This is great to perk your skin up for an event, date, or family photos. Use a few hours before your event for glowing, firmer skin with or without makeup. For regular skin care, may be used once a week. When pressed for time, I use the egg whites lightly beaten, not thick enough to form peaks. The benefit of whipping it, though, is that the chances of egg white dripping down your neck as it dries is greatly reduced. Bottom line: whipped or lightly beaten, the end result is the same. Tightened pores and smoother skin.
EGG WHITE TONING MASK
Ingredients:
Favorite cleanser
Favorite face scrub. One of these days I'll post my recipes for sugar and salt scrubs.
Facial moisturizer
1 cold egg. I like it cold because it feels soothing on my skin.
Electric mixer. Because I'm lazy and will not hand whip this mask!
Vanilla extract. If the thought of smelling raw egg whites on your face makes you squeamish.
Directions:
-Cleanse face thoroughly.
-Exfoliate skin with scrub. Rinse. Pat dry.
-Separate egg yolk from the white. You will only need the white for this toner.
-In a medium bowl, whip egg white until it's all frothy. If the smell really bothers you (it bothers me some times more than others) this would be the time to add one drop of pure vanilla extract for a more pleasing scent.
-Apply to clean face and do something relaxing while your mask dries. I usually put on some music and curl up with a book.
-Rinse thoroughly and pat dry. You've got to touch your skin to believe it! It will be smoother, tightened and refreshed.

FUN FACTS
-Over time, this mask can help your pores appear less visible.
-Add 1 tbsp of honey before whipping to create a mask that can heal as well as tighten.
-Honey is a natural antibacterial, helping any open blemishes to heal and with continued use, is great for unclogging pores.
Now, obviously, taking care of a very active little boy and the normal routine of running a household doesn't always add up to uninterrupted blocks of time for spa treatments. Because I'm generally in a better mood the rest of the week when I take time for myself, I use what I have. And that usually means breaking up the time I use into realistic increments. For instance, today, when Baby Boy went down for a nap, I did the Hot Oil Treatment and Egg White Mask. I have other things to get done for the remainder of naptime so, I'll leave the pedicure for later on tonight when Little Man's down for the night. That way neither Baby Boy, the house, or I suffer :) Anyway, just thought I'd throw that out there to encourage you to make time for yourself because the relaxation is worth the effort. Happy Spa Night!
Rice Water Toner
White rice
Rice pot
Warm water
Ladle
Container with lid
Directions
-Add rice to rice pot.
-Cover with about 1 inch water.
-Swirl rice around until the water gets cloudy
-Let sit 5 minutes.
-Ladle rice water into container.
-Keep covered in fridge for 1-2 days.
-SHAKE WELL before each use. -Apply to clean face and neck and let dry. May be used before makeup application and after makeup removal.
Optional: I added 2 drops of tea tree oil before placing in the fridge. Tea tree oil is a natural antibacterial so I'm hoping it will fight the bacteria and make the toner last longer than 24 hours. At least until I make another pot of rice! I'll let you know if it works :)

Look how much rice water could be collected from rinsing one pot of rice! Wow. If it could last longer, this would be the cheapest kitchen beauty treatment ever!

There are so many more sophisticated Asian beauty products that can be purchased that offer beautiful results. But rice water caught my interest because the cost is so reasonable (we always have rice!) and it's still being used by people today.
Oh yeah, after squirreling away the water, don't forget to add more and cook the rice!
-------------------------------------------------------------------------------------------------------------
Homemade Hot Oil Treatment & Vinegar Shine Rinse
More spa goodies out of your kitchen cabinets! I decided to post this because of a request for it, and also, my hair is in sore need of a treatment. So here are my absolute favorite treatments for dull, dry scalp and hair. There are fancier recipes around, but I love these because they work for me and the ingredients are relatively cheap. Gotta love a great deal on feeling pampered!

Pour extra virgin olive oil into a saucepan. Add dried rosemary, stirring in slowly. Place the pan on the stove and heat over medium heat until the oil is warm. I set a timer for 2 minutes and then remove it from heat. You want the oil very warm, not scalding hot.

Strain through a paper towel to remove rosemary.

Coat hair from the scalp to the ends with mixture. For oily hair, use more on the shaft and ends and a small amount near the scalp. For extremely dry hair, saturate everything including scalp. For either hair type, pay special attention to hair ends.
Twist hair upon itself on top of your head and wrap in plastic wrap or shower cap.

Heat up a damp towel in the microwave until very warm (about 2 minutes). Towel should be steamy but not scalding hot. Wrap the hot towel around your head and let the oil treatment do it's magic for 20 minutes.

Remove the towel. Remove and discard plastic wrap. Wash your hair twice with a mild shampoo (when I say mild, I mean no Head & Shoulders) to remove all of the oil. Rinse the first shampooing out with very warm, almost hot water. Rinse the second shampoo with slightly warm, almost cool water. Going immediately from hot to cold water always gives me a huge brain freeze type headache so I don't do it.
For your final step, saturate hair with the vinegar rinse mentioned earlier. Let sit for 1 minute. Any longer and it might have a drying effect. Rinse with cool water until vinegar smell is gone. Cold water seals the hair shaft and locks in shine.
Before. Dried out and frizzy.
 After. The lighting's not so great, but you can immediately see that the hair is moisturized and there's zero frizz. If you could see it in person, you'd notice there's a HUGE change in deeper color and lots of shine. Try it and see!

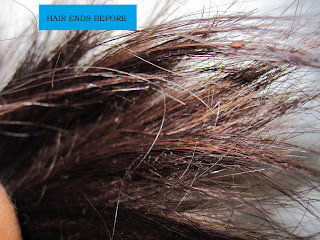
Happier endings :) Still need trimming, but they're not dried out anymore.

You'll love your shiny, soft, dandruff free hair!
Vinegar Shine Rinse
This needs to be prepared either ahead of time or while you let the oil treatment set because you'll need it for the last step of this treatment.
Ingredients
1 cup water
1 Tbs apple cider or white vinegar
Pour both ingredients into an empty bottle and shake to combine. Set aside for later. This is the rinse recipe doubled so I have extra for later in the week.

FUN FACTS
-Vinegar closes hair's cuticles (keeping it from absorbing excess dirt) and removes scaly buildup leaving hair smooth and shiny. It also promotes circulation in the small capillaries essential to healthy hair growth.
-The vinegar rinse can be kept in your shower and is safe to use once or twice a week after your normal shampoo for shiny, residue free hair. Over time it helps control dandruff as well.
Hot Olive Oil Deep Conditioning TreatmentDO NOT ADD ROSEMARY IF PREGNANT OR NURSING.Large quantities of this herb could cause vomiting, nausea, and muscle spasms in women who are pregnant or breastfeeding. The hot oil and vinegar rinse will provide more than enough conditioning and shine for hair.
Ingredients
1/2 cups of extra virgin olive oil
1 Tbs dried rosemary
Pour extra virgin olive oil into a saucepan. Add dried rosemary, stirring in slowly. Place the pan on the stove and heat over medium heat until the oil is warm. I set a timer for 2 minutes and then remove it from heat. You want the oil very warm, not scalding hot.

Strain through a paper towel to remove rosemary.

Coat hair from the scalp to the ends with mixture. For oily hair, use more on the shaft and ends and a small amount near the scalp. For extremely dry hair, saturate everything including scalp. For either hair type, pay special attention to hair ends.
Twist hair upon itself on top of your head and wrap in plastic wrap or shower cap.

Heat up a damp towel in the microwave until very warm (about 2 minutes). Towel should be steamy but not scalding hot. Wrap the hot towel around your head and let the oil treatment do it's magic for 20 minutes.

Remove the towel. Remove and discard plastic wrap. Wash your hair twice with a mild shampoo (when I say mild, I mean no Head & Shoulders) to remove all of the oil. Rinse the first shampooing out with very warm, almost hot water. Rinse the second shampoo with slightly warm, almost cool water. Going immediately from hot to cold water always gives me a huge brain freeze type headache so I don't do it.
For your final step, saturate hair with the vinegar rinse mentioned earlier. Let sit for 1 minute. Any longer and it might have a drying effect. Rinse with cool water until vinegar smell is gone. Cold water seals the hair shaft and locks in shine.
FUN FACTS
-Olive oil is an amazing natural moisturizer. It also works great as an all over body moisturizer on damp skin fresh out of the bath.
-Rosemary has been used throughout history in home therapy to deepen natural hair color.
-If it's the first time in a long time that you've done a deep conditioner, you may want to do the treatment once a week until you get your hair where you want it. Then you candeep condition only when you need it. Most people only need it once or twice a month.Can you see the difference? I can! My hair doesn't look like it was abandoned in the desert anymore. It even feels better.
Before. Dried out and frizzy.


Happier endings :) Still need trimming, but they're not dried out anymore.

You'll love your shiny, soft, dandruff free hair!
-------------------------------------------------------------------------------------------------------------
Chocolate Honey Mask
3 Tbs honey
1 Tbs unsweetened cocoa powder
In a small bowl, mix ingredients until consistency is smooth. There will be air bubbles.

Apply to face, massaging into skin. Leave on for 20 minutes. If you get bored because you also happen to be waiting on the dishwasher to get done while dyeing your hair, you could always whistle. Ha!

Apply toner and moisturizer and you're done! Enjoy your unbelievably soft skin.
I used a homemade sugar scrub before using this mask, but if you're short on time and want to eliminate the extra time spent on the scrub but still get the benefits of a good scrub (like removing dead skin cells), just adding one more ingredient to the Chocolate Honey Mask can help.
1 Tbs dry oatmeal. That's it! Oatmeal.
When you massage the mask into your skin, the oatmeal will act as a natural exfoliant and soothe your skin too! Honey is a natural antibacterial, helping any open blemishes to heal and unclogging pores. The chocolate powder contains natural antioxidants and supposedly protects your skin from damaging free radicals.
Spa Night in general helps me unwind and destress. Do you need a little relaxation in your day? Try this simple mask and leave the stress behind for a few minutes. If nothing else, you'll feel pampered and you'll see the improvement in your skin. Plus, this mask smells divine!
-------------------------------------------------------------------------------------------------------------
DAILY HEALING TONER
Ingredients:
3/4 cup Witch Hazel (available in the pharmacy section at WalMart near the rubbing alcohol). Witch Hazel will eventually help to tighten and reduce the appearance of pores so there will be less chance of clogs and damage to your pores.
2 drops of Tea Tree oil. Effectively treats and promotes healing in infections (pimples, blemishes). I got mine at Hobby Lobby for $6.
Water
1/4 cup Green Tea. It has healing, and supposedly anti-aging properties and soothes my irritated skin.
2 Tablespoons Apple Cider Vinegar or White Vinegar. A natural astringent for cleansing gunk from your pores, but gentler than the chemical kind.
Favorite moisturizer
Directions:
-Boil water and steep 1/4 cup of green tea. Set aside to cool.
-In a bottle of your choice, add cooled green tea to witch hazel.
-Add tea tree oil and vinegar. Shake well.
-Apply to freshly cleansed face and neck with a cotton pad or clean washcloth. Let dry and apply moisturizer.
-Store in refrigerator. Shake well before each use. Great to remove excess oil throughout the day, after exercise, etc. Normal use would be once or twice a day, but especially at night after cleansing.
My toner made with this recipe. Fresh out of the fridge, shaken up and ready to apply.

I'll be sharing more of my homemade spa recipes in the future. Hope you get to try this! It's economical, all natural and doesn't have any harsh chemicals in it. I'm not an expert, but I have been using my own products for a long time and have loved the results. If you have any questions for recipes for different types of skin or a particular beauty problem, ask me and I'll do my best to find the right combination of ingredients for you.
