We are all inventors, each sailing out on a voyage of discovery, guided each by a private chart, of which there is no duplicate. The world is all gates, all opportunities.
Ralph Waldo Emerson

Showing posts with label project. Show all posts

Saturday, April 2, 2011

Homemade Interchangeable Flipflop Bling

So the other day I was in a boutique and saw a thing called Switchflops, which are basically flip flops that have a metal snap where you can place decorative flowers or faux jewels on your flip flops depending on your outfit. Well, I thought I just had to have some, but wasn't going to pay $20 and up for them. I've racked my brain until I came up with a homemade solution and now I cannot wait until the warm weather sticks around so I can show them off! Also, I've got visions of flip flop bling made out of fashion jewelry... but I'm getting ahead of myself.

If you've already done this for yourself, my cheap creative heart salutes you. And why didn't you tell me???
;-) Here you go homemade divas. Enjoy the endless possibilities to prettify your flip flops and show off your pedicure this spring and summer!


Here's the type of glue I use for all my projects. It's amazing! Once it dries it's permanent, waterproof but flexible. Perfect for hair or flipflop bling :)


I started out with 2 pairs of plain flip flops. They're on sale everywhere! Big Lots has them for $2 a pair and Old Navy is selling tons of colors and sizes for $2.50 a pair if you buy 2. I can't get them at WalMart because I have a latex allergy and theirs always seem to make me break out in hives, but anyway.....

Place a line of glue on the underside of the straps in this area.
Let the glue cure for 1 or 2 minutes until it becomes tacky.

Measure and cut a 2 1/2 piece of ribbon. This will work for larger feet which I *ahem* have. You can measure and figure out what length you need once you see what it's for.
You'll need 2 precut pieces of ribbon for each flip flop.
So I cut 8 for my two pairs of flip flops.

Place one piece of ribbon on the underside. Be sure only half the ribbon is glued to the underside. The other half will need to wrap over to the top.

Here's how it should look from the top after you apply the ribbon to the glue underneath.

Place a dab of glue on the end of the ribbon...

And fold it over the top. Press firmly into place. Repeat on other side so ribbons overlap each other.
You'll have a ribbon X with ends glued down and no glue in the center. We need the top center to stay glue free so you can add your bling.

Clamp into place with clothespins or whatever you have. I used alligator hair clips because I have a ton.
Let cure for 24 hours for best results and then remove clamps.

I made a few 2 inch flowers to personalize my flip flops. They're attached to alligator clips. I'd like to find smaller clips than these next time, but it's what I had.

Place the bottom of your clip through the unglued loop we created with the ribbon pieces.

Oh the pretty frilly girly possibilities!


So yeah... now I'm on the lookout for brooches and clip on earrings in the clearance sections to add more bling to my flip flops!

Hope you are inspired to make some pretties for yourselves, Beauties! Have a wonderful weekend!


Sunday, February 20, 2011

New Etsy Arrivals

A sneak peak at a few new items in my etsy shop all created by yours truly:

Flirty Jasmine Rosette Headband

Sweet & Sassy Jasmine Rosette Headband

Cloudy Skies Rosette Headband

Spring Fling Pua Necklace

Stony River Embellished Frame

Visit my store ToaSamoa on Etsy to see more handcrafted items.

I just had to say a very quick hurrah before signing off. Today I've had 5 sales and I'm currently working on filling 2 more orders! God is good!

Sunday, August 15, 2010

Susan's Just as Lazy, Only Prettier

Remember my lazy susan from a recent thrifting trip?
Well, when I found it I knew it would have to be cleaned and/or revamped but I really thought I could take the easy way out and just get away with giving it a good scrub.

That was a nice dream.

It turns out (get it?) that the stains are permanent. Well, poor lazy me. Time to sort through my fabric stash and get out the Mod Podge.


First things first, it had to be taken apart.  You can really see the stains in this photo.


Next, I made a template and traced it onto my fabric.


Good old Mod Podge. I was a little heavy handed with it. It's been years since I've used it and forgot that a little goes a long way.


After adding the material and a few top coats of mod podge, so it can be wiped clean after use.
Doesn't little Suzie look fabulous?


I love it! It's so me :)


Isn't that fabric adorable?
I love turtles......


My pretty coasters have a nice place to hang out until they're needed. 
And the lazy susan is perfect for tea time snacks.


What's your favorite frugal makeover? 

Linked to:

Thursday, August 12, 2010

Peaceful Space: Master Bath

On a recent thrifting trip I came home with these dried tropical-ish flowers. 


Oh yeah! Now that's my kind of bargain for meaningless dust collectors.


After arranging them a bit.
They're now adorning my island themed master bathroom. Aren't they lovely?


Why yes, that is a salsa jar that I hot glued shells to.
I had originally planned to cover the entire bottom half of the jar with shells but ran out and couldn't find the rest. I still may complete the bottom half if I ever find those stinking shells! I know I have them!
Anyway.
My solution to this was to stuff loose raffia into the jar to cover the stems.
I kind of love it. Odd though it is.


Aaahhh... hello pretty thrift store dead plants!


Top shelf.
Still working on it, but it's coming along nicely.
Tropical-ish "painting" was a yard sale find from last year. $4 I think.


My organic, homemade beauty treatments from American Samoa.
There's this amazingly talented woman who has a shop. She makes all the products and they're just lovely!
I was addicted, but now the cheapo in me is winning out and I'm making my own for less than a fourth of the cost.
Oh yes, I'm using the last of my supply sparingly....trying to draw out the inevitable.
Moisturizing oil body spray, lavender healing creme, my homemade soothing bath salts, moso'oi scented coconut body oil, more lavender creme, and my favorite products from that organic shop: Coconut oil based facial soap. I had nearly 12 bars and these are the last brave survivors.
Oh well, I use them for bathing now anyway, since finding the Oil Cleansing Method.


Ooh, my scent bug from Bath and Body Works with their home fragrance oils.
I have scent bugs in the guest bath and living room as well. All gifts from some wonderful family members.

The two oils used to scent the master bath are : 1)Caribbean Salsa  2)Sensuality: Black Current Vanilla. 
I mix them on the pad to create a unique fragrance. Mmmm... romantic and islandy.
Hey, we're going for an island resort feel on a very tight budget. Work with me here! 


Second shelf.
My basket full of Bath and Body Works goodies. Also gifts. Wow, I have frivolent tastes. And some very wonderful family members (enablers) who know what I like!
And yes, I love homemade bath products, but this stuff is a deliciously fragrant habit I have not been able to kick yet.
I realize it may not be the 'thing' to decorate with things that would typically be in storage but, hey I'm in a teeny apartment and having them up here really frees up my limited space under the sink.
What's sad is that I used to have twice as much, but only now put up the shelves.


I love this Dollar Tree flower pot holding one of my repotted African violets.
It's twin is also holding a plant in the master bedroom.


And one look at the entire thing.
I'm feeling a little closer to Samoa already. *sigh*
Hubby saved the shelves from being thrown out at a construction site when we first got married. They're solid wood. And brand new. What, are construction companies crazy now, throwing away quality shelving??
Yes, I love my frugal man. And I love those shelves!

The green lei twisted with white flowers is actually from our wedding. Sent with beautiful aloha from my lovely Aunt in Hawaii who also blessed me with the sheepskin rugs I'm so crazy about.

The bamboo box on the commode was full of gorgeous tropical flavored tea from my sisters.
So I transferred the tea to a kitchen cabinet and couldn't wait to get the tropical looking box to the master suite. It's empty for now. I'll eventually find something to put in there.


Thanks for stopping by to see my progress! I'm really enjoying putting our home together :) Each room is an adventure. It's slow going but so far I'm extremely happy with the results!

Ooh, Guess what? In the first photos are the brown shelves from my To Do list in the sidebar! I get to mark that item off! Sweet!!

Linked to:

UndertheTableandDreaming


Monday, August 9, 2010

Island Jewelry Lost & Found

A pretty mother of pearl pendant from my loving Hubby. 
It was an anniversary gift a few years ago and I've never worn it because I kept waiting to find the right gold chain for it.

The problem is, I'm a silver girl and have to be in the mood for gold and every time I went shopping at the jewelry clearance sales for that perfect chain, I wasn't in the golden mood.

I found my pendant again the other day and thought, this poor thing is going to be sitting in my jewelry box forever! I wished I could wear it. 


So after rummaging through my island jewelry, I found something else I love but never wear. 
A simple long shell lei that never quite looked right on it's own. 
So I put the two together.


Voila! I had to wear it right away :)

And I've gotta say, I LOVE it! Simple, gorgeous island jewelry that I had in my jewelry box all along.
I'm glad I finally figured out they belonged together.

Have you recently rediscovered something that you love?

I'm linking to:
Keeping It Simple

Can I just say I adore that Jen at Craftomaniac lets us link up TWO projects for her Monday parties? For a chronic crafting mini project doer like myself, it's heaven! Not to mention great motivation!


Guest Bath Decor in Progress

So, the guest bath looked like this for a long time. Well, the navy rugs are still in place, that won't change until we find something we love at a great price, so I guess it still looks like this.
But with a few changes.


Maroon silk from my stash became fabric flowers added to the drapes around the tub.


I removed the fabric that had been tied into that huge droopy bow in the center of the drapes (never really liked how it looked) and taking a cue from my guest bath inspiration, used it to soften the bit around the mirror. I can finally mark it off the list! Yay!


With it's very own silk flower :) I'm in love with these easy to make beauties!


Peel and stick hooks and a bit of ribbon work as tiebacks around the mirror.
Thank you WalMart. And thank you projects that leave just enough ribbon to feel guilty about tossing out but not enough to think of a use for right away.


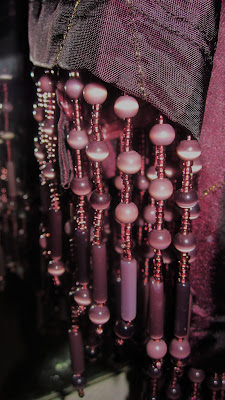
The mini mirror drapes are actually table runners from my sister's wedding reception and each one had different beading on the edges, so they don't match.

But I love them anyway!


Of course, Bath and Body Works always has something to go with a room theme.
I'm going to keep refilling this bottle once it's empty because it matches so perfectly with my feminine maroon bath! I'll miss the delicious smell of this soap, though.


On the little sink counter I added homemade bath salts and tea light candles to the leaf shaped tray for a little ambiance. The salts have a citrus cherry fragrance that lightly scents the bathroom. Mmmm!
Behind is an antique sterling silver purse I was given as a wedding gift. It's just beautiful with the detailed work.


And that, in a nutshell is one of our constantly work in progress spaces in our little apartment home. Thanks for stopping by!

It seems like everyone has at least one space that is constantly evolving, what is yours?

Start Swagging!

Recommended reading and other products...